Hello
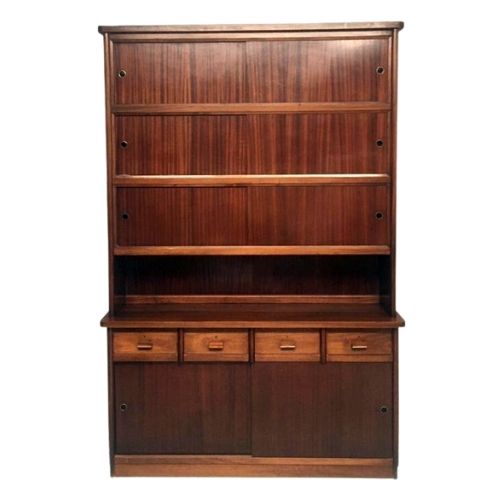
This is my first restoration project. As you'll see the sideboard was in quite a sorry state (painted and wallpapered). I've stripped the paint but am unsure what to do next as it looks quite damaged to me.
I've received conflicting advice re: electric sanding vs sanding by hand and varnish vs oil finish.
Any tips/shared experiences greately received!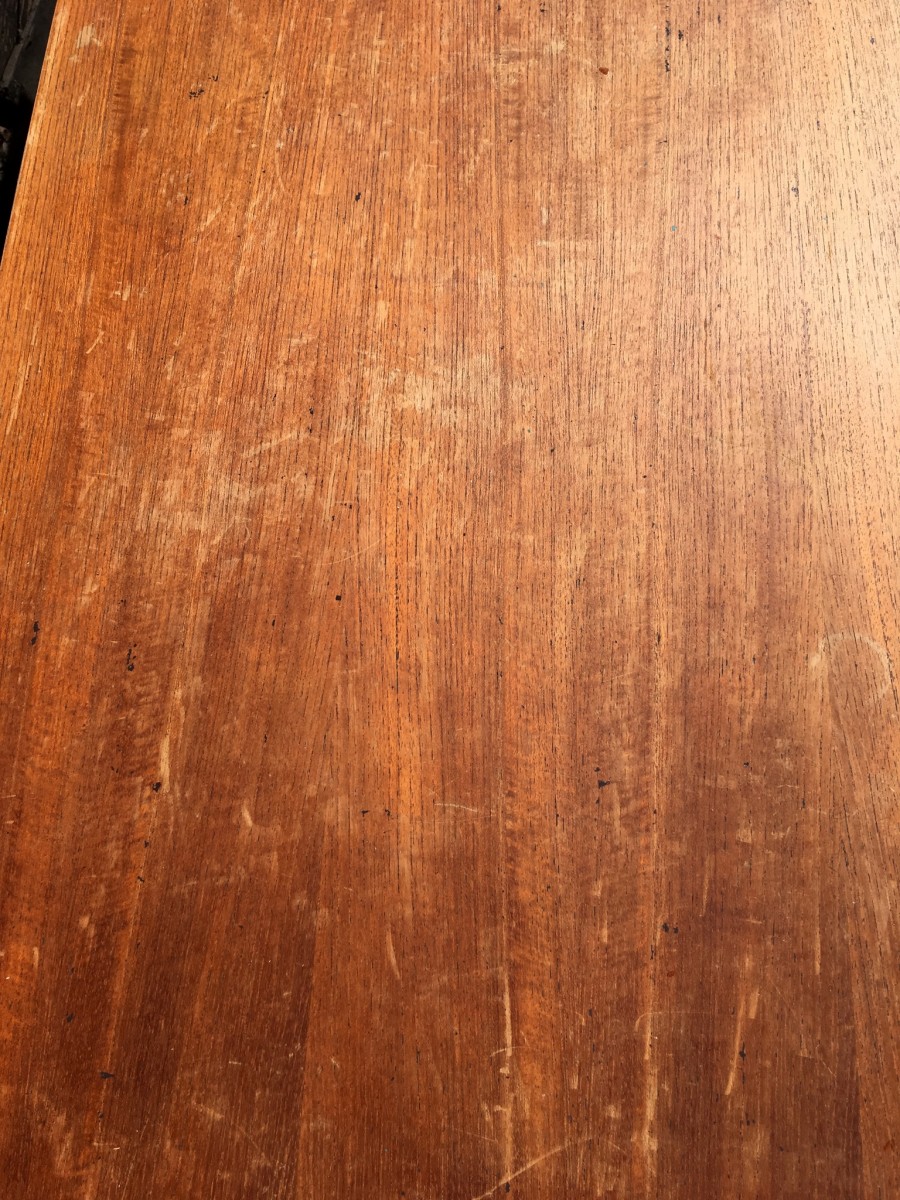
 <img class="wpforoimg" src=" http://d1t1u890k7d3ys.cloudfront.net/cdn/farfuture/XlKz_4NTBv3vv0RpQswYOZ
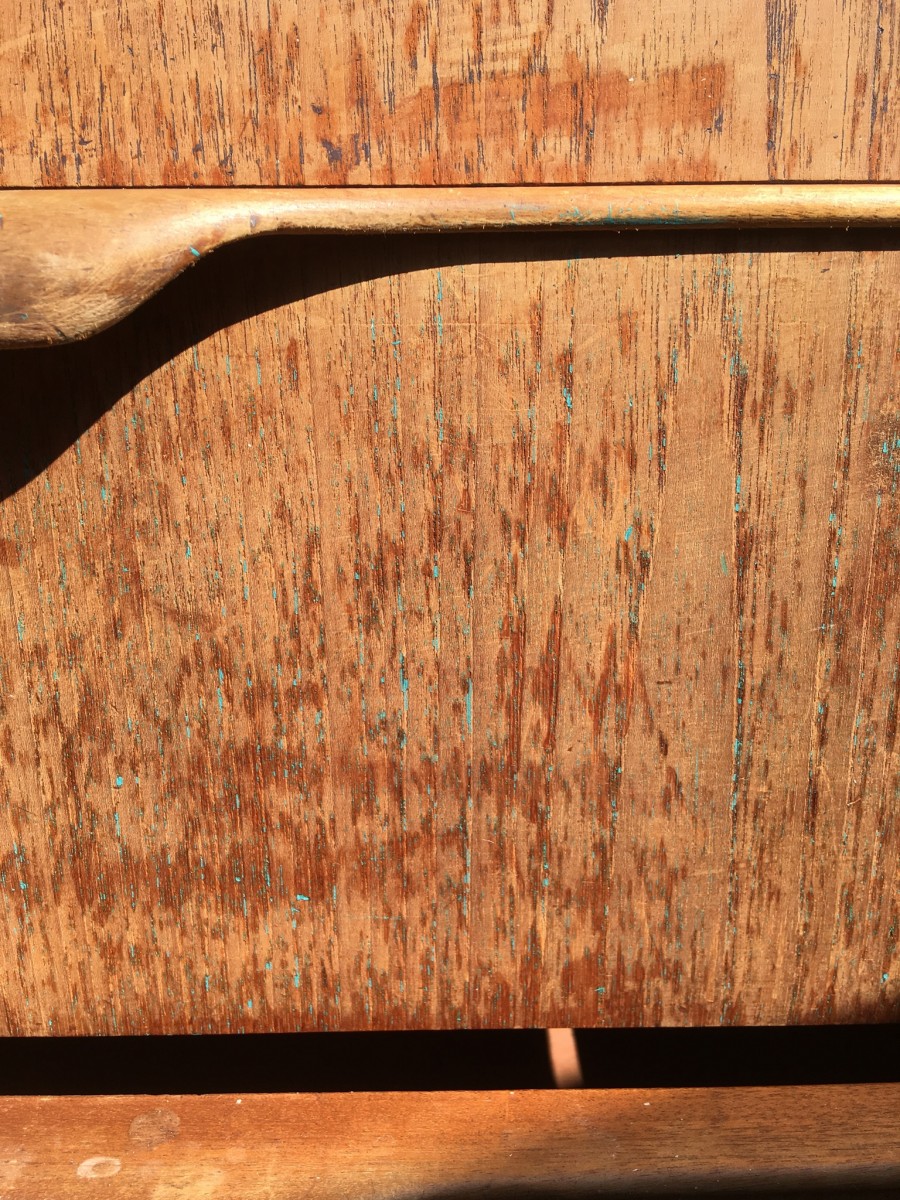
I dont see anything that would say that the piece is ruined, but with out being able to inspect it closely myself, I could not say for sure. I looks like it had paint and wall paper adhesive on it. What did you use to strip it? The paint should not have gone any further than the surface, but it is hard to say what the adhesive for the wall paper did.
In any case, you will not have that great of an idea until you start sanding. You need to get the paint out of the grain, then sand. You will need to use some sort of stripper or solvent, along with a tooth pick or the like, to get the paint our of the grain. It is a pain, and is tedious, but there is really no other way to do it.
I am not familiar with the veneer thickness of the British pieces, but as with any veneer, take it slow and pay very close attention to what you are doing. Sand with the grain. If you use a random orbit sander, always follow up with the same grit, by hand, gently, in the direction of the grain, after the sander. I would start with 150 or 180 grit if using a sander, and 120 if doing it all by hand. You can start with a courser grit, but if you have not done a bunch of sanding before I would not recommend it. Let the paper do the work, dont push too hard. It definitely takes some experience to understand exactly what the sand paper is doing to the substrate, and with veneer, you just dont have much room to 'learn.'
Do NOT try to sand the paint out of the grain. Like Zephyr said, you will need to pick the paint out with a toothpick, or an awl, or a needle, or something pointy.
Then it will be a fairly straightforward refinish job. It almost looks like it will look good enough to skip any sanding and use the "Spanky Method" with teak oil and steel wool.
Be very, very, very careful with sandpaper. If you go through the veneer, you will have ruined it and you might as well re-paint it then. And the UK was making its own Danish-ish designs because Danish imports were expensive in that economic environment, so I expect the veneer will be as thin as it gets.
Especially be careful sanding near edges, and areas where edge banding meets veneer. When the piece was originally made, it was also sanded prior to adding the final finish. I find that these locations are where the manufacturer had to sand the most, to eliminate uneven joints, misalignments, etc. and therefore are typically the places where you will burn through the veneer first. Not to mention, it is really easy to apply uneven pressure near the edges, which also accelerates burn-through.
I just had some very slight burn-through on a Jens Risom Credenza that I am redoing. I actually think it was already there, and was covered up by the Risom-Marble Company with some artists paints, because it was literally not there one moment, and one pass of 220 by hand, and it was (I am always watching very closely when I am sanding veneer, and I mean really close).
As Leif said, you can probably get by with just teak oil and 0000 steel wool. I would plan on doing half-a-dozen oil applications over the period of a few weeks. It will probably result in a well-worn look, vintage look. I personally like doing full restoration on these medium to low valued pieces, because they are hard to resell otherwise, but if this is for personal use, and you don't mind the vintage wear, then I would give the oil only method a go first. I certainly don't mind having the worn vintage look on my nicer pieces for personal use, in fact I prefer it in many cases.
The only thing I am concerned about, in your case, is the patches of original finish which appear to remain on the surface. If this original finish is lacquer, or some other film-building finish, then the oil-steel wool method may not work, until you have stripped all this old finish off (chemically, with a razor blade, or sanding). You can see these areas in the second picture, the one of the drawer face.
Are we all using our Swedish steel (or substitute) cabinet scrapers, like efficient little do-bees ?
Good. My uber master Tage Frid taught us how to sharpen our first scraper. We want a somewhat flexible one, not one made out of heavy steel plate suitable for boiler plate. And we want to coax a curled edge on all four arrises of the scraper so we can get maximum use from the tool before returning it to the vise for a re-do. A good flat file, a pair of wood blocks, one with a little step near the bottom to catch and hold the scraper in the vise, and a burnisher. I started using the back of a 3/4" chisel and have had the same Sandvik plastic-handled chisel for over 40 years.
And another thing: how many of us have discovered that the whole chisel-sharpening thing is a sham, promoted by people who want to sell books, and stones, and classes . . . All I do to prepare my chisels is to give them a careful dressing on a fine wheel (the white one, when available, but I usually do without) followed by a very minimal wipe of the back, to flatten my burr. Yes, under a glass this method leaves a saw-edge burr -- of course -- but as long as the flat back has never been dressed (turning the chisel into a kind of ski) I'm happy. This edge is so easy to create -- and recreate -- that one isn't tempted to labor with an ever-duller tool, putting off the laborious multi-step stone-sharpening chore.
And I still have that chisel, so not that much material has been removed, in the time I've had it. Well, okay, maybe an inch and a quarter, or so. I don't do as much handwork as some of you guys: I like to machine my joinery as much as possible:
SDR, I agree with you completely, except that using a cabinet scraper is typically not for your first-timers. I make the assumption that if you are asking on this forum how to restore a furniture piece, that sharpening and using a cabinet scraper is probably beyond your skill set, just as those beautiful joints you show above are not for the first-timer.
Yes, try a thinner one. It's a major difference. Frid espoused them for everything from paint removal to . . . I don't know what.
Early on in the cabinet trade, once away from all-laminate and into actual furniture and hardwood, I sharpened a springy putty knife, to cut freshly congealed glue squeeze-out from the interior corners of a cabinet, without wetting (usually) or spreading the glue around. Worked like a charm, and it became a standard tool for me.
I find we have to invent, sometimes: modify a tool to our own liking -- teach ourselves, in other words, as well as picking up ideas from others. Like, for instance, the sanding block or board -- a (perfectly flat) piece of 3/4 or 1" plywood or MDF, 4 1/2" x 11" or half a sheet of sandpaper, which is glued with contact adhesive (spray) to both sides of the board. Perfect for breaking edges and other sanding tasks where a little weight, and a flat surface, allow "planing" and/or a consistent application of sandpaper . . . They used these in one shop I worked in, and I've had them ever since.
Third thing: masking tape as a clamp -- perfect for gluing miters, or applying strips of solid edgebanding, or for other light-duty clamping tasks. It's the stretchiness of the tape that makes this work. Works like a charm. To miter 3/4" panels, lay them point-to-point, outside face up, and apply strips of tape across the the joint, or a long piece of 1 1/2" or 2" tape bridging the joint. Then turn the whole thing over -- carefully -- and apply glue to the open vee, pressing it down to the apex with a finger. Hinge the joint closed, and secure at 90
If you need any help, please contact us at – info@designaddict.com


