Hello,
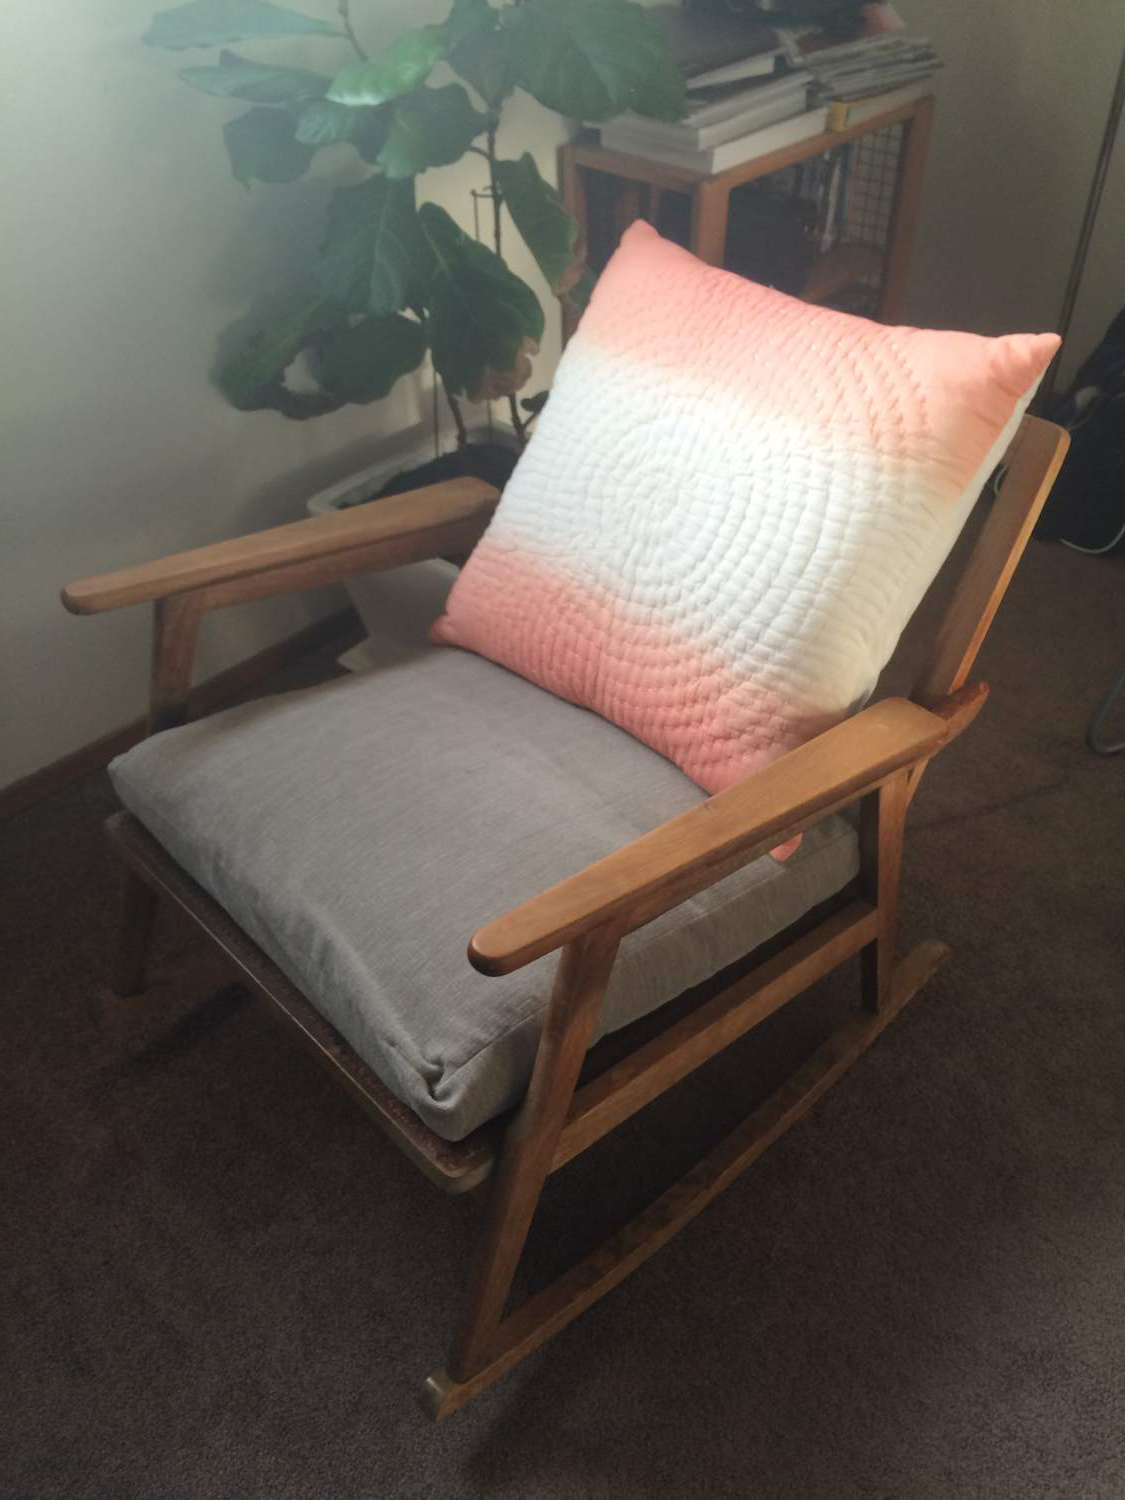
First time posting here. I recently aquired a rocking chair for my first nursery. It needs to be refinished overall. My first concern is the seat. The coils were removed at somet point and a thick fabric was nailed in it's place. If I'm going through the trouble of refinishing it, I might as start with the coils.
In my initial research, I've determined the type of spring and the distributor in the UK. The shipping cost is crazy, but that's another discussion. Anyway, can I get some input from others who have used EXPERSPRING before? I've read a few other threads and am wondering what the difficulty level is here..? It looks like I need 5 coils total. From what I understand, connectors are included with the coil purchase? I wish there was a video out there that demonstrated the use of these coils. Additionally, how do they stay in place..simply tension?
Also, are there absolutely no distributors in the US??
TIA

Yes, they are held in place by tension. On the chairs I've seen, the grooves were angled a bit which helped to keep the loops in place.
If the loops you get are on the short side, you might find it helpful to have a second person stretch the loop while you work the end into the groove. Some go on easily, others are really tough to do.
Good luck!
Wow, thanks for sharing the ebay buyer!! This makes me feel so much better about the process overall!! Sounds like I will enlist my husband to help me put on. I wanted some reassurance before I removed the fabric and feel more confident about taking it apart. I just took some photos and also saw there were two wholes, one on each opposing side from the spring loops. Are those original too and is was it just a dowel, or did someone put that in afterwards when the coils were probably becoming weak? I just uploaded photos. Sorry should've been sooner.
Another follow up question..The chair didn't come with the original cushions, so someone had one custom made for a pillow. It isn't very firm and doesn't have a very defined shape. If I plan on having new ones made, the cushions are still foam, batting and upholstery fabric, correct? I ask because I haven't sat in a chair with these coils before and don't know how it will feel.
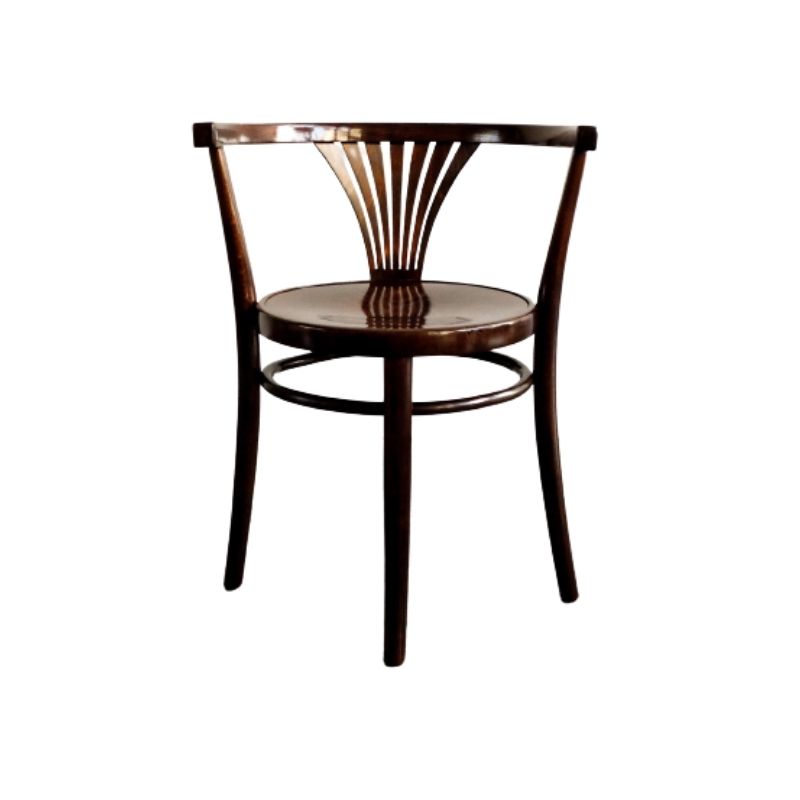
Wait a sec---are you sure it needs spring loops? Have you removed the fabric on the seat frame yet? It looks like it might by a Yugoslavian-made chair and they did use spring coils but theirs were often just bare springs with no vinyl coating at all. I used to have a lot of them but I gave them away. The ones I had didn't have a lot of tension in them and made for a very saggy seat.
If this is indeed a Yugoslavian chair, I would just use conventional elastic webbing (2" wide) and staple it to the seat frame with a pneumatic stapler. These chairs are not of great value, even though nice enough in looks, and in my opinion the improvement in comfort matters more than sticking to original materials.
The pegs on the back end of the seat frame fit into the corresponding holes in the chair frame; likewise with the pegs on the front of the chair frame and the holes in the front of the seat frame. They have nothing to do with the spring loops. They are original to the chair.
Foam: you will probably want firm density in the seat cushion, at least 3" thick, maybe even 4" depending on the look you want. Glue upholstery grade batting, NOT quilt batting, to the foam with spray adhesive. Finished dimensions of foam plus batting should be about 1/2" bigger in both directions than the seat frame, then cut your fabric to fit the frame exactly (plus seam allowances, of course). If your foam/batting is not a little bigger than the cushion cover, the cover will look slack.
If you're not confident about doing boxed covers, consider getting a pro to do it. Cushion covers with ripples and tucks really detract from the finished look of the chair! If you're a novice and want to try it yourself, stay away from bulky, thick, and/or stiff fabrics.
The foam for the back should be 1" less in thickness than the seat, otherwise the chair will look top heavy. And it should be at least one level softer in density. If you use the same density foam on seat and back, the back will feel too firm (or the seat too soft). This is because most of your weight is on the seat cushion.
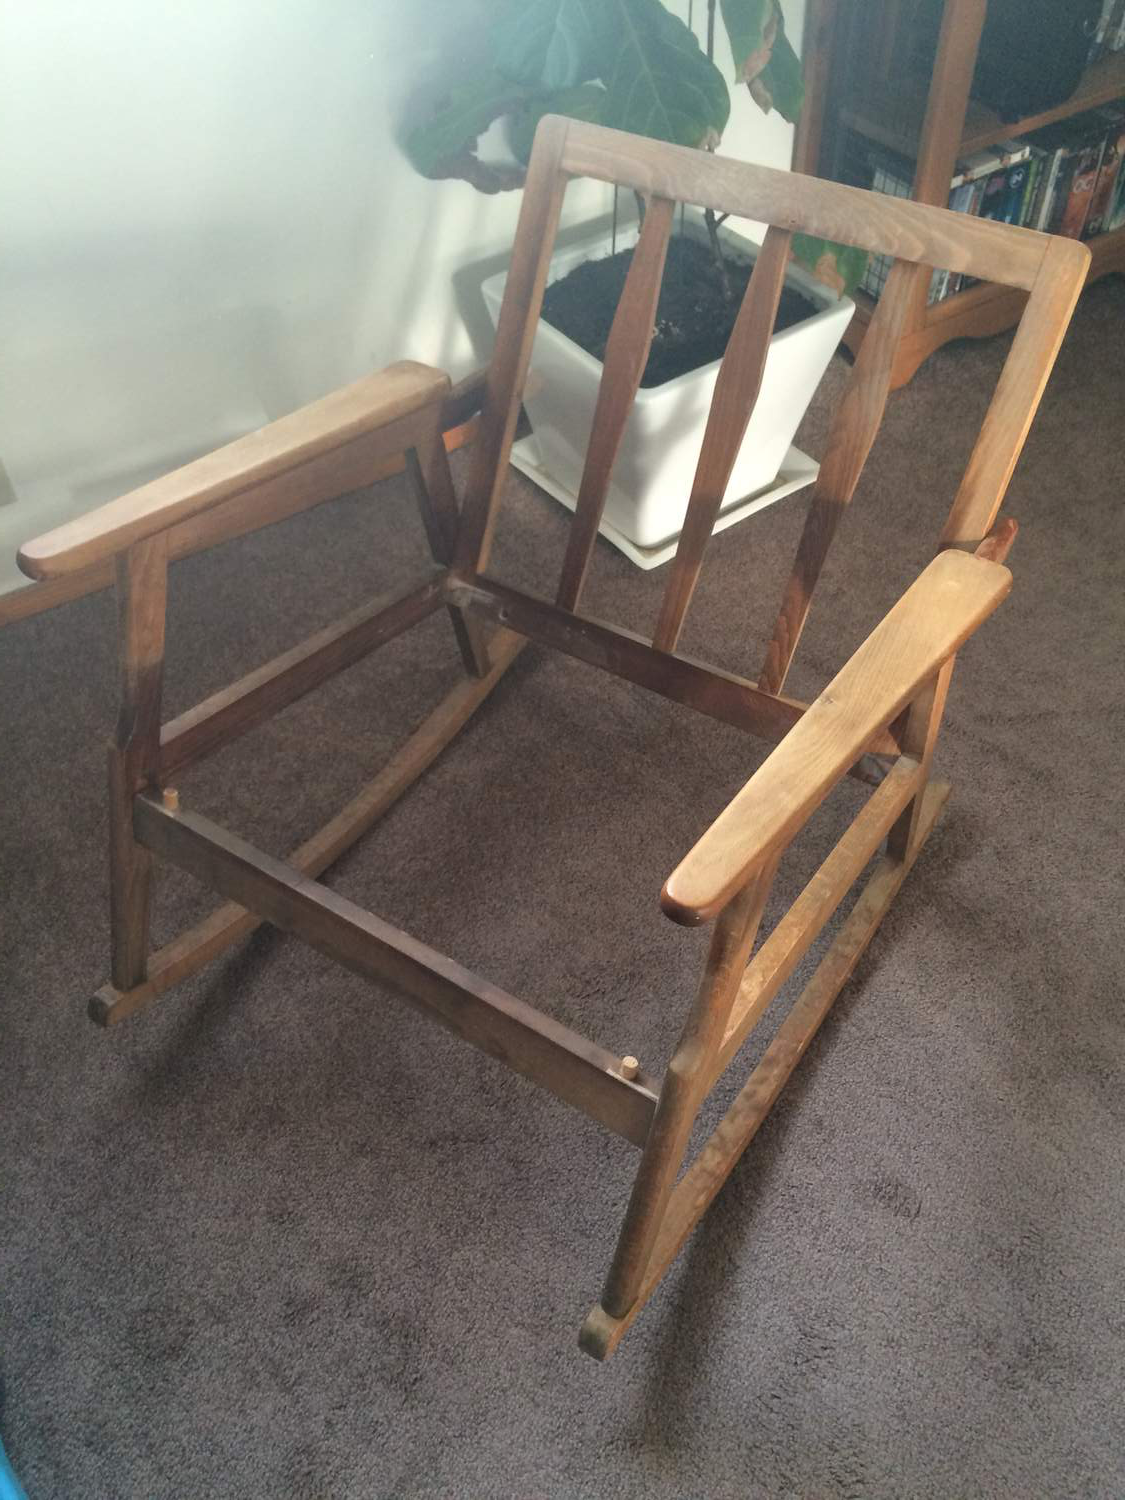
I have not removed the fabric. If you look at image 4, you'll see 9 holes (out of 10) that seem to be in pairs on the right, which made me believe they were for spring coils. On the left of that same image, you'll see one of the two holes I was mentioning in my last post. There is another hole on the opposite side of the frame, in addition to little corresponding holes on the outside position of the frame (that's probably really confusing, sorry)
How would I confirm if it was Yugoslavian? Would the coil space look any different? What would make it less valuable?
Thanks for the information on the cushions! I am a confident sewer, but will probably do more research first!
Some Yugo-made chairs are incised "Made in Yugoslavia" on the iside of the frame somewhere but not all are marked. This could be American though I'm not sure American manufacturers used those type of springs. Whereever it was made, the chair isn't terribly valuable. The lack of shaping on the parts of the frame is the biggest clue. They're all just rectangular profiles with the edges rounded off to the same degree. The armrests look to be separate boards attached to the tops of the side frames. This is an expensive way to produce a chair.
Wood species--judging from the overall look of it, it looks a lot like furniture I've seen in person that is beech with a stain or tinted lacquer to make it look like walnut or whatever. If you can post very clear photos of wood on various parts of the chair, including the endgrain of an armrest, and places where the grain looks different and/or blotchy in color, that would help in ID'ing the wood.
I do see the spring holes now--thanks! That part of the photo is very dark on my screen so they were not readily visible. That's exactly what they are.
@Spanky - You have provided me some great information, thank you. When I get home I plan on inspecting it to see if there is a stamp anywhere hidden. And you're right, the construct isn't as seamless. In fact, when we purchased it, she noted there was a squeak and after getting it home and removing the seat base, i noticed a few places where it was weak, which I read is consistent with Yugo-made "knock-offs". I paid $150 and am not upset about it.
I will probably add a photo later too, just for confirmation, because I would like to know how to approach finishing the wood. So much for me to learn.
I will probably put some elbow grease and money back into it, but go with cheaper alternatives, like webbing. Do you have a resource for this, or a sample image of what it should look like when it's done? Also, how would I calculate how much I need?
My end goal is to having something attractive for my nursery, with a low profile, that could I sell for what I put into, if necessary. So I can either love it, or not be out anything. On a side note, is there a false market (or uneducated) market for mid century furniture? I say this in context of Yugo-made furniture. I mean, it's still vintage and still a piece of working furniture. It seems like there are uneducated people pricing it along the lines of other furniture of greater value and there are people who buy into it for a lack of supply?
There's definitely a market for low end vintage MCM stuff. I think it's mostly younger people who can't afford the better stuff or who just like the general look of it without wanting to get serious about it. Who knows how long the trend will last, though. Some of this crowd might stick with it and move on to better quality stuff, others will drift on to the next trend, whatever that might be.
A lot of the posts on Apartment Therapy show stuff like this so that site can be a good way to track the trend, I guess. If you want to appeal to this crowd for resale, do the cushions in a bright mod-ish print or a solid color that isn't a boring neutral! That's what sells at the moment.
Webbing: the kind you want is 2" wide, woven, black in color with a red strip running down the center. You can measure the frame to figure the amount needed. Do at least 4 strips in each direction. You will need an extra inch on each end to fold over to neaten the look, but then you can subtract about 2" per strip for stretching. Figure all that, then ADD about 9" to the total length. This is because you need an end to grip on the last strip in order to stretch it.
Do NOT cut the webbing into separate pieces. Staple one end to the back of the frame, stretch it over and down on the front edge (you have to pull hard) and mark it at some point that makes sense to you in relation to the frame (at the outer edge, inner edge, whatever). Let go and measure this so you know where to mark the rest of the pieces. Alternatively, stretch it about 2 inches and staple it in place, then match the others by twanging them and stretching until the pitches match. This does not work if you are tone deaf.
For the sides, weave the loose end over and under the front/back strips, staple the end, then stretch and staple.
The webbing is easy to find online, just google "elastic upholstery webbing". I think it comes in various weights. The black with red stripe is generally the heavyweight stuff. It is a very hard stretch. You can buy it by the yard or in a 50' roll (more than you'll ever need).


If you need any help, please contact us at – info@designaddict.com