Skip ahead to the ------------------------- if you don't need the backstory:
A year or two ago I picked up two Eames fiberglass chairs from the curb, in near perfect shape. This snowballed into an addiction (site's named appropriately), moving through the different fiberglass chairs and then into the aluminum group.
I've now owned 5-1/2 or 6 of them depending on how you count it. The first was a side chair, granny smith apple green cloth, no arms, no tilt, not very comfortable, but really nice looking. The next was a high backed soft pad lounge chair in blue hopsack (not the very very high backed version). Still, not as comfortable as I expected without tilt or an ottoman. I was really surprised that it didn't even swivel, but again a cool looking chair and I learned how to replace the pads.
Then there were two ICF white mesh desk chairs. With arms, tilt, pneumatic lift, everything you need in a desk chair, and finally they were comfortable to me and the build quality was really good (not what I expected after reading a bit online). I don't know what happened when vitra took over all of europe, but the ICF chairs are on par with herman miller with the exception of plastic washers where HM uses metal to hold the fabric in place at the corners. They use a different base that's not interchangeable with the others, and the arms were slightly narrower but look the same.
Along the way I bought one for parts, an ugly green one with arms and broken tilt. This is the one I'll be taking apart.
I went to visit my family in texas where the market for leather soft pad chairs isn't so nuts and I lucked out and picked up a EA217 soft pad for a decent price. Now I'm in a happy place with the aluminum group and I've sold off most of the others, but I still have the light green one with nice fabric, and the dark green one for parts.
-----------------------------------------------------------------------------------------------------------------------------
Recently Scott B. posted a thread about swapping material and it had me thinking about trying to swap material from chair to chair. http://www.designaddict.com/forum/Repair/Eames-Soft-Pad-tear-leather
I tore into it today, and it wasn't too bad, so I might give it a go. If nothing else I hope this thread is useful for anyone who needs to repair or restore these chairs. I haven't seen any pictures like this online, so it's just been a mystery until now.
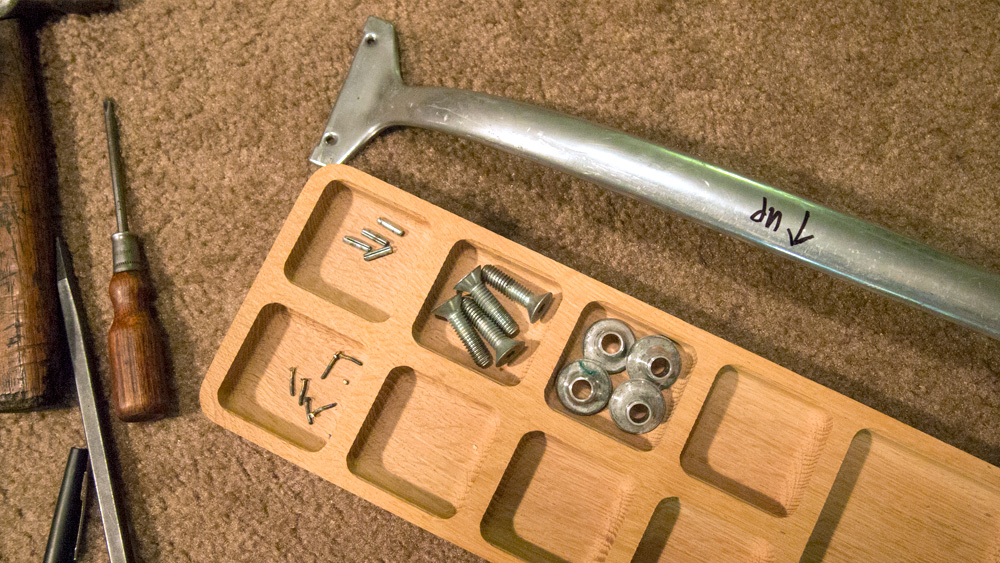
Tools and Supplies:
1/8" Punch
1/16" Punch
Hammer
3/16" Hex
Slotted Screw Drivers (very small to medium in thickness)
Pliers (needle nose and small ones)
1-3 glasses of wine, beer, etc.
This will to be broken into multiple posts. Apologies if the pictures aren't so great.
STEP 1: Remove the Base
3/16" hex or similar to remove the base. You may or may not need to spread the frame slightly to keep from scratching it up.

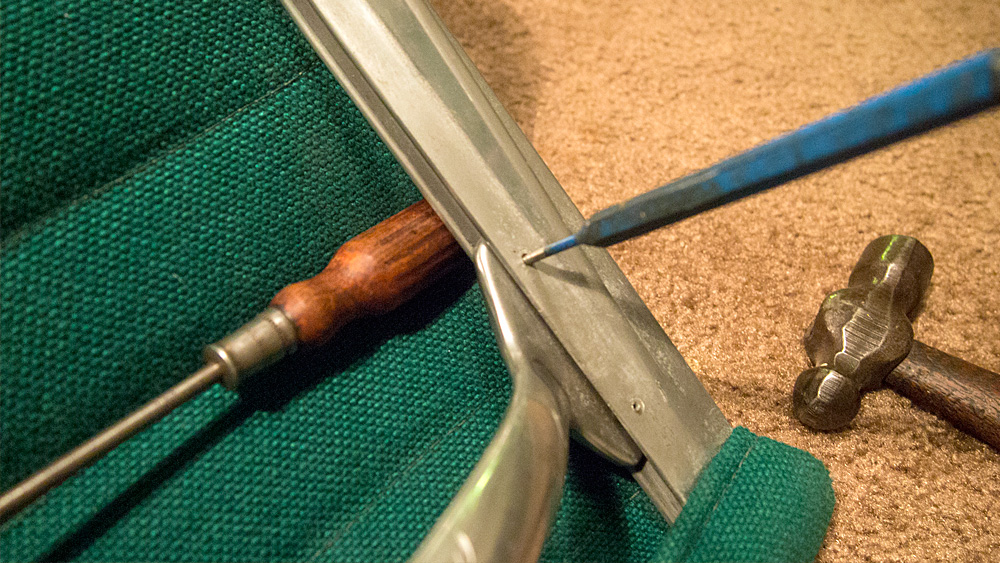
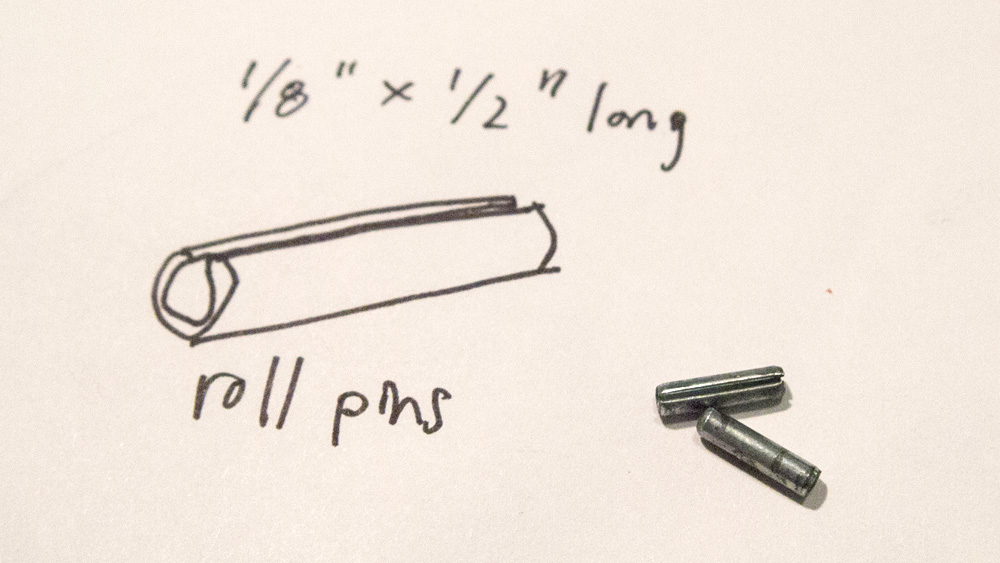
STEP 2: Remove Backrest Bar Roll Pins
The backrest bar is held in place with (4) 1/8" x 1/2" Roll pins. Punch them out. Be careful not to punch them through the upholstery. I grabbed something nearby, happened to be a screwdriver, and jammed it between the frame and the upholstery, then punched the pins out. Tap lightly on the punch with a hammer and keep it straight.
STEP 3: Remove Hex Bolts at Corners
Remove the hex bolts at each corner with a 3/16" hex key. These are pretty tight so you might need a breaker bar, or a proper hex socket on a ratchet.
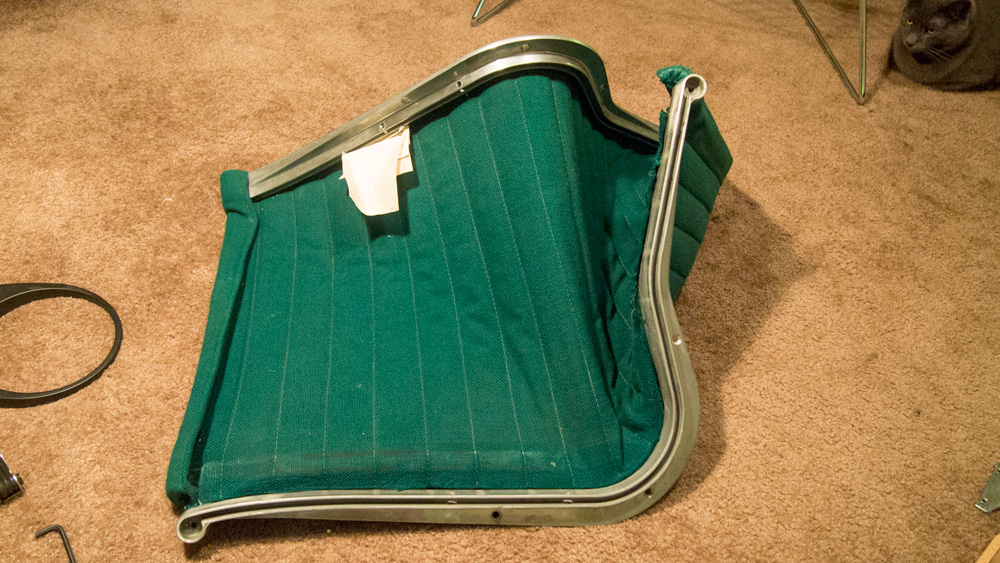
STEP 4: Pry up Caps and Remove Upholstery
Pry up the aluminum corner caps with a flat screwdriver. Peel away the upholstery. It seems like it was glued in place on installation.
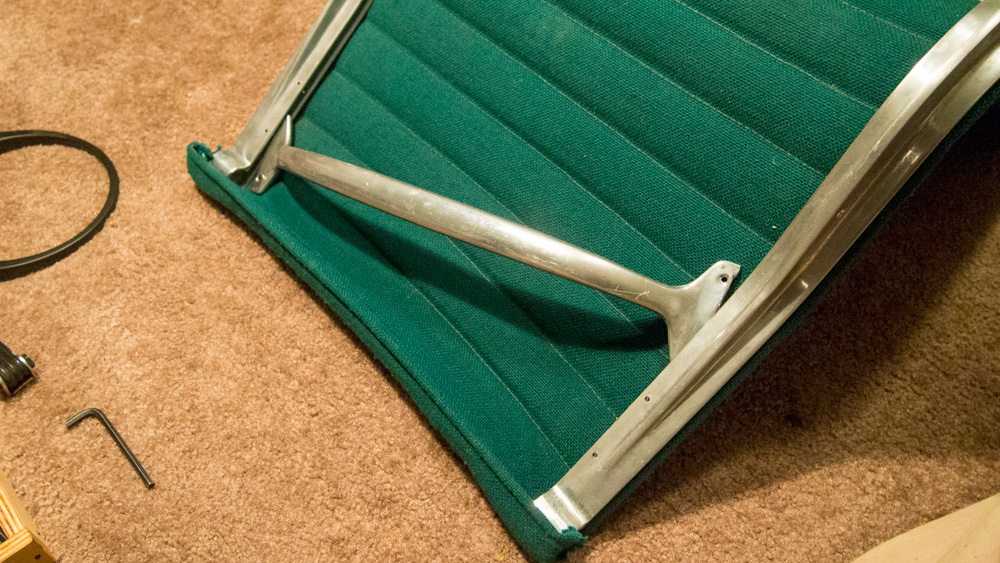
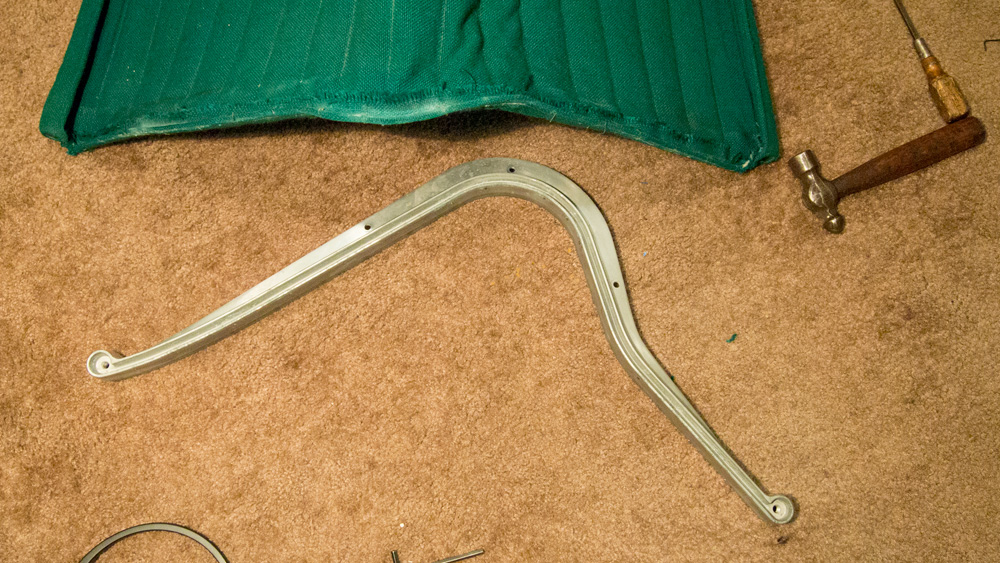
STEP 5: Remove Backrest Bar
Angle the backrest bar toward the top of the chair and it should come out. Spreading the frame shouldn't be necessary.
STEP 6: Flip the Frame Rail inside out
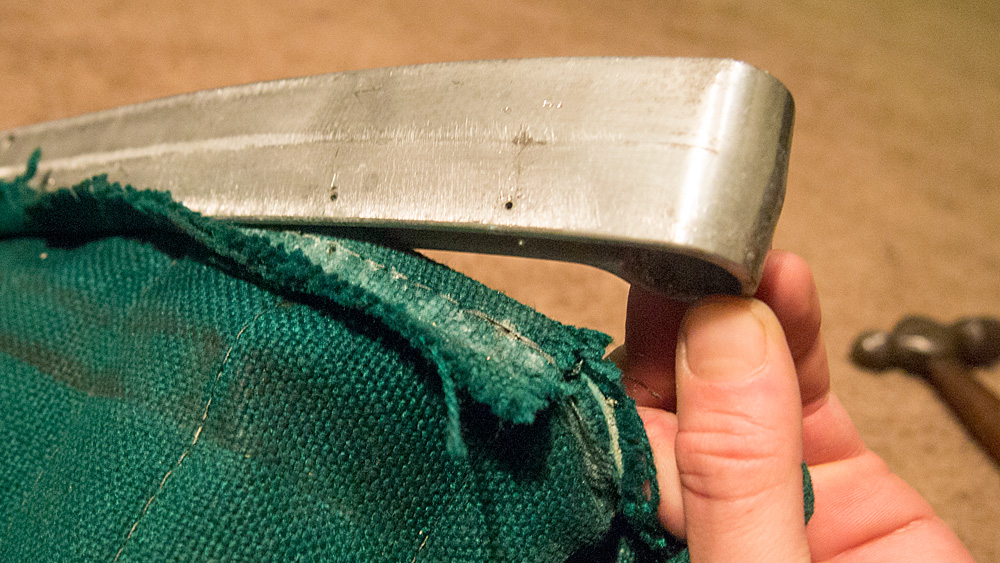
Flip the frame rail around so you can see what's going on underneath that upholstery. Peel back the fabric to reveal the nails that hold the upholstery to the frame.
STEP 7: Remove the Nails
Some of the nails will be proud of the frame. Pry them up with a very thin flat screwdriver. When you can grab them with pliers, do so, and pull them out.
STEP 7 (Continued): Remove the Nails
The nails measure 1/16" x 1/2" and they bottom out in the frame after piercing the upholstery, then the heads get flattened to the frame.
Inevitably, some of the nails are completely flush with the frame. There's no way to pry them up. Some of the heads will break when you try to pull them out and then what? Drilling them out is problematic because the damn drill won't hold a 1/16" drill bit and the egg beater drill takes ages.
Drink another beer.
Then shear those little fuckers. Put a thin but strong flat screwdriver inside the gap in the frame and knock it with a hammer.

STEP 8: Installation is the reverse of removal?
I think the important thing is to mark the location of the nails on the upholstery (blue tape?) so when you go to put it in the new frame it'll line up.
There's going to be the issue of getting the backrest bar reinstalled, and then the base, but that just takes some prying apart.
With the soft pad chairs you'll have another layer of upholstery to deal with.
You'll probably have to cut some nails down to the right length. They're not pointed on the end at all.
to be continued?...
Hi, I know this was posted ages ago but i'm looking to strip down my Vitra EA-109 (i believe this is the model) with mesh covering in order to get the chrome removed which is flaking so I can bring back the underlying aluminium.
My first issue is removing the base! The screws holing it on will not budge. Do you think removing the tensioning bars first will make it easier? The chairs are circa 2000 so not too old.
Thanks in advance.
Mike
@kniperider, I'd probably try using either a screwdriver bit in a ratchet wrench to help provide some leverage or possibly an impact driver. As @racecar mentioned above, removing steel screws driven into aluminum can be difficult. Additionally, Vitra may have used screws coated in a thread-lock adhesive (essentially hot-melt glue). Gently heating the area with an electric hair drier may help to soften this if so. Make sure to use a new or unworn driver or bit that provides a positive fit in the screw heads, too.
Good luck!


If you need any help, please contact us at – info@designaddict.com