hi folks,
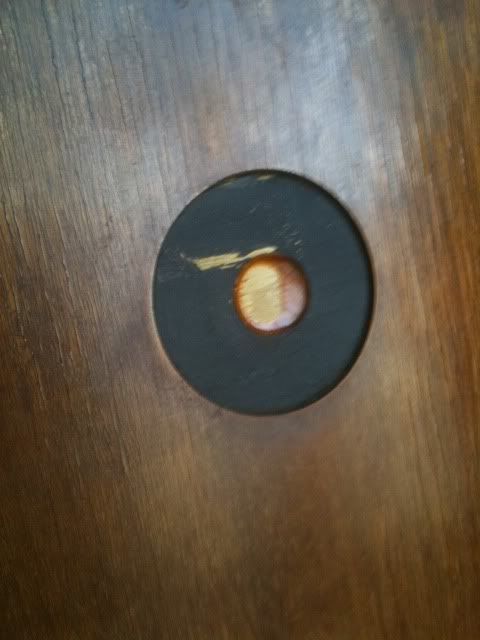
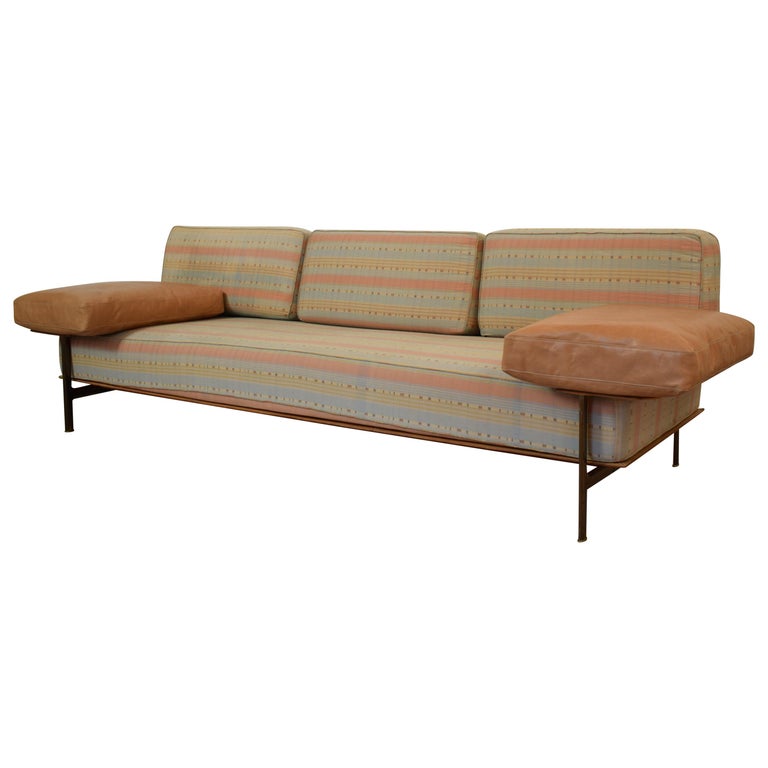
i ust acquired an early example of a DCM with its back rest that came off from the shock mounts.
i'd like to seek some advice on how to prep the areas for an attachment of replacement shock mounts.
what's the best tool to use to scrap off the residue?
should i sand the area or should i refinish the area before i attach the replacement shock mounts in place?
any other advice would be appreciated.
thanks,
fb
 <img class="wpforo-default-image-attachment

Thanks for
the great photos. Perhaps you could share with others the technique or equipment you used for these extreme close-ups.
I don't know how the pros do this -- but as a seasoned woodworker I would want to make a router template with a hole of the same diameter (or just slightly less) as the cut in the chair back. It would take a bit of fussing to get the template clamped securely to the chair part, at the appropriate angle. Then, using a top-bearing flush router cutter, I would create a new "land" in the plywood.
This is because the new shock-mount wants to be adhered to a perfectly planar, and clean, wood surface.
The photos show a feature that I wasn't previously aware of: the chair back had been prepared by the manufacturer (?) in an analogous manner. That is, a flat area has been drilled or routed through the finished surface (or, possibly, precut and masked for finish), to accept the shock mounts. The method I propose essentially recreates this -- ideal -- condition.
thanks SDR
for your advice. i was hoping to find a way that requires only hand tool. but if that is deemed to be unlikely, then i would certainly take the router route.
oh, the photos were just taken with my old iphone, good source of daylight plus steady hands can go a long way i suppose. my hands are evidently not too steady as indicated by the last 2 photos that are slightly out of focus.
Well, they're far
better shots than we often get, here.
The only way I can get such close-ups with my 2 MP camera (ten+ years old) is to hold a pocket magnifier to the from of the lens. And I get a distorted perimeter to the image.
The issue at hand is how to arrive at a perfectly flat mating surface for the new adhesive; any deviation is apt to compromise the glue joint (in this notoriously finicky repair) as I see it. Neatly cutting away dried glue residue, from a material which is much softer than the glue itself, is fraught with difficulty. Milling it off as suggested is more likely to give the desired result, than would be cutting and scraping with a sharp chisel (for instance). And I don't expect that there is a chemical that will dissolve the glue. But I await other suggestions . . .
Well, Bigs, it so happens that I consider
myself somewhat of an expert in this area since I've recently completed my ninth, yes ninth, successful shock mount re-glue on a set of four DCMs I bought through DWR in 2000. That's fewer than one per annum! I've actually done it ten times. Eleven, if you count the one on my lounge chair, but I had to redo one of my repairs to a center seat mount on a DCM.
The trickiest part is proper surface preparation. I prefer to start with freshly exposed wood and a perfectly clean, fresh surface on the underside of the puck. I'm fortunate enough to have a good variety of small woodcarving chisels and gouges and the skills to use them confidently, so carving out the residue of the bad batch of adhesive that HM used (they admitted as much by phone!) was a relatively straightforward, if tedious, task for me. You can buy a small set of tools made for linoleum-cut printmaking at an art supply for not much if you care to try this technique.
Others may argue that complete removal of the old glue residue is not necessary, but I'd rather not discover later that it is.
If you should decide it's worth a try, let us know and I'll detail a basic approach and some tips/cautions on technique.
I've used three different epoxies on my previous repairs. West System 105/205 and two products from Protective Coatings Co., PC-7 and PC-11. The PC-11 was the one that failed and, surprisingly, at the joint recieving less stress than the those on the backrest! I guess I'd have to recommend the PC-7 out of the three. It's rather pasty to work with and a dark gray color, but some of my repairs are approaching the ten year mark with no signs of imminent failure present.
Edit: Bigelow, it looks like you're gonna need at least one new shock mount. I'd probably buy two, so they match, of the best quality I could find. If you want to reuse the original screws, that's something to pay attention to.
SDR, while having two perfectly mating surfaces is always ideal, I've found the PC-7 to provide excellent structural gap-filling performance within the range of tolerance likely in this application. That said, I've become aware of the limitations of epoxies in dynamic loading situations such as are in play here, and I'm curious about a couple of new flexible two-part adhesives available now. West System "G/Flex" and another called "Plexus" from ITW. On the next one, perhaps!
SDR lighting is the key
for the extreme close up shot especially if a shallow depth of field is used. thanks for the extra info.
tktoo, i appreciate your sharing of the experience and expertise. i certainly am interested in making the attempt to do it with the linoleum tool. so please detail a basic approach and tips and cautions.
thanks,
fb
Tyler, what's with those holes?
Had the backs been drilled through?
Bigelow, I'm happy to help, but where to start? Are you in the US? Do you have new shocks already? Got good manual skills, reasonable grip-strength, and a little patience?
First is assembling the tools and materials. Do you need an itemized list?
thanks tyler
i will check out your blog.
tktoo,
yes i am in the US.
no i haven't ordered the new shock mounts yet. there are a few options in terms of where to buy them, do you have any thoughts on which ones are the best?
i'd like think that i have good manual skills, a reasonable grip-strength as well as little patience, i guess we'll see if that's really the case!
an itemized list of tools and materials would be great.
thanks,
fb
Probably best if we take this offline.
Recommending vendors, especially one that I might, could be taken as advertising, even though I'm not in any way affiliated.
Besides the shock mounts, everything should be readily available to you locally or from a giant online retailer named after a river.
My regluing experience
I have reglued a DCM using just a utility knife to scrape off the glue and bits of shock-mount, and then used a thin layer of epoxy glue. I'm sure this is not the optimal strategy, but it's easy and still holding strong after 6 months of daily use. I'll post a note 15 years from now to let you know if it made it in the long run 🙂


If you need any help, please contact us at – info@designaddict.com