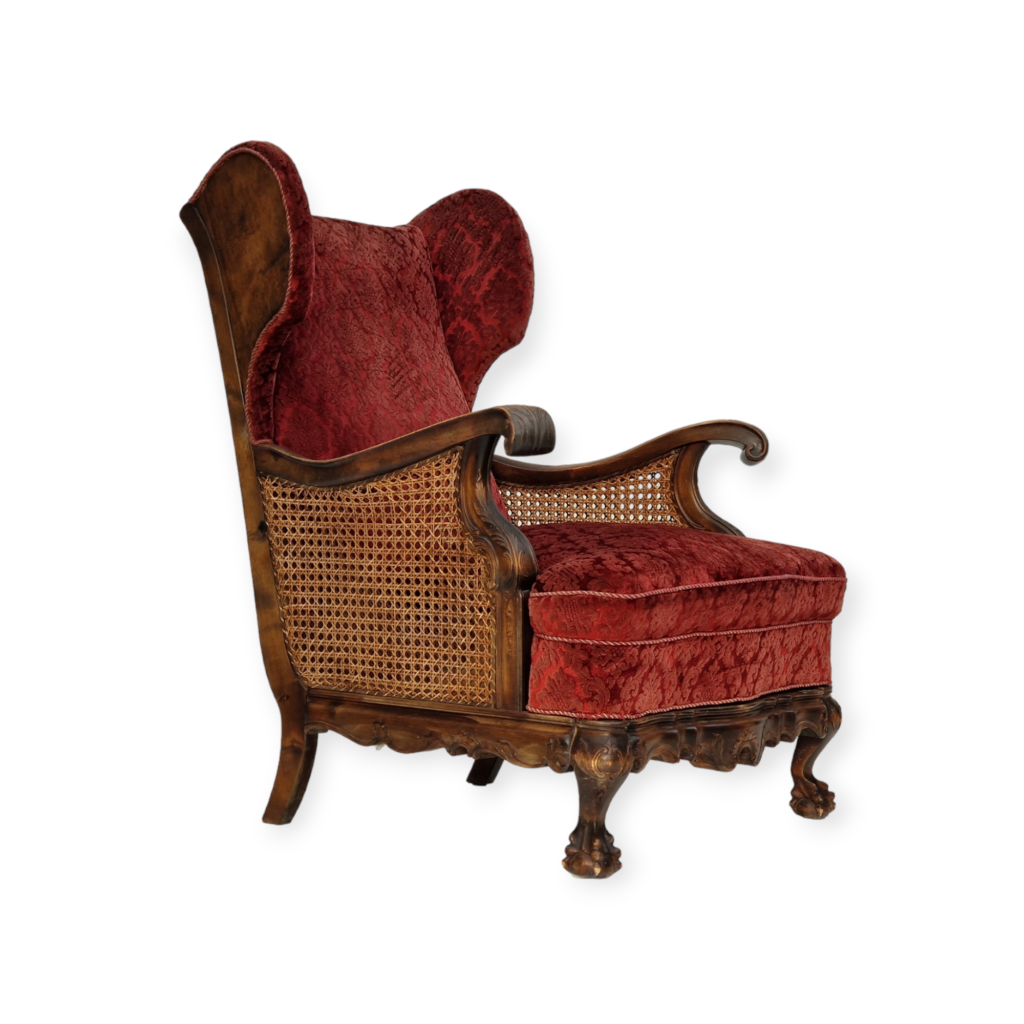
I recently picked up this neat chair. I usually do do not find things similar to this where I am located in West Texas. It is built well and in fair condition. Wondering if anybody would be so kind as to shed some light on who may have designed or distributed this piece? It has a break running down the front of where the straps are tacked. There is also a spot I will show in the photos where I believe a tag once was. Will this be a simple fix? A little wood glue and some clamps? Any and all info will be greatly appreciated of course! Thanks a ton.

Repair procedure
To repair that crack I would pull the piece, gently, until it break off completely. Do this with as little force as necessary, and avoid wedging screw drivers or sorts of wedges into the crack as much as possible. I can usually twist and pull a break like that apart little by little.
Then when it is completely open, clean out any foreign material, dirt, lint, etc. And if there are misaligned spliters inside remove them.
Test the fit, using clamps if necessary (sometimes when wood is split open it releases internal tension that bends the remaining pieces). If the two pieces fit back together invisibly, you are ready to glue. If not, continue cleaning the joint.
When you have got the dry fit right, apply wood good I use Titebond II or III. Use a stick or your finger to spread the glue everywhere on both edges. Then fit the pieces back together. And clamp them until you squeeze every drop of glue back out of the joint. Remove excess glue as you go.
You want the thinnest glue seam possible. If you can get an invisible seam dry fit seam, and then clamp it, you will end up with a joint as strong if not stronger than the wood was when solid.
If you can't get an invisible seam dry, you may need to reinforce with screws. Prepare the holes for the screws when it is dry clamped, glue it, clamp it, and then screw in the screws. The screws will act as extra permanent clamps.
Congratulations on your find!
Thanks Leif!
I will follow your instructions carefully and hope for the best!
*spanky* -
I did think the straps were a bit unusual. They seem to be original though? Any idea of the designer/maker? Does this seem as a quality piece to you? It looks to be solidly built.
Thanks again for your time!

I would
support Leif's thoroughly-described procedure without hesitation.
The photo, however, seems to show a break with a bad match between the two parts of the front rail -- that is, material seems to be missing. It's not clear to me how this could be. But when I encounter a problem like that, I sometimes resort to removing material from both sides of the split (assuming the break makes a straight line) by routing or jointing the pieces so that new and perfectly flat mating surfaces are created -- when the object can afford to lose an eighth of an inch or more in dimension.
If the seat frame can be removed from the chair frame, it could be passed through a table saw, which would simultaneously remove the damaged zone and provide (if carefully done) a new pair of surfaces ready to be glued. The strap slots could be enlarged as necessary before the two pieces are re-connected.
If a single pass through the saw doesn't successfully result in two parallel surfaces, one or both sides will need to be dressed, perhaps (again) on the saw or with the use of a jointer.


If you need any help, please contact us at – info@designaddict.com