Thanks again for all of the input. I've cleaned and oiled the chairs, but maybe still need to do some more oil. I also had a surprising amount of success cleaning the seats, namely one large stain on the armchair. I attached some before and after photos. The seats weren't improved as drastically as the yellow light in the before photos make it seem, but they came really clean and I'm hoping will continue to lighten up over time.
So, after almost two months of pretty regular use, the arm chair has started to show its age and the seats are starting to tear apart thread by thread. (It's somewhat shocking that its almost one strand per day that is splitting on the front edge of the chair.)
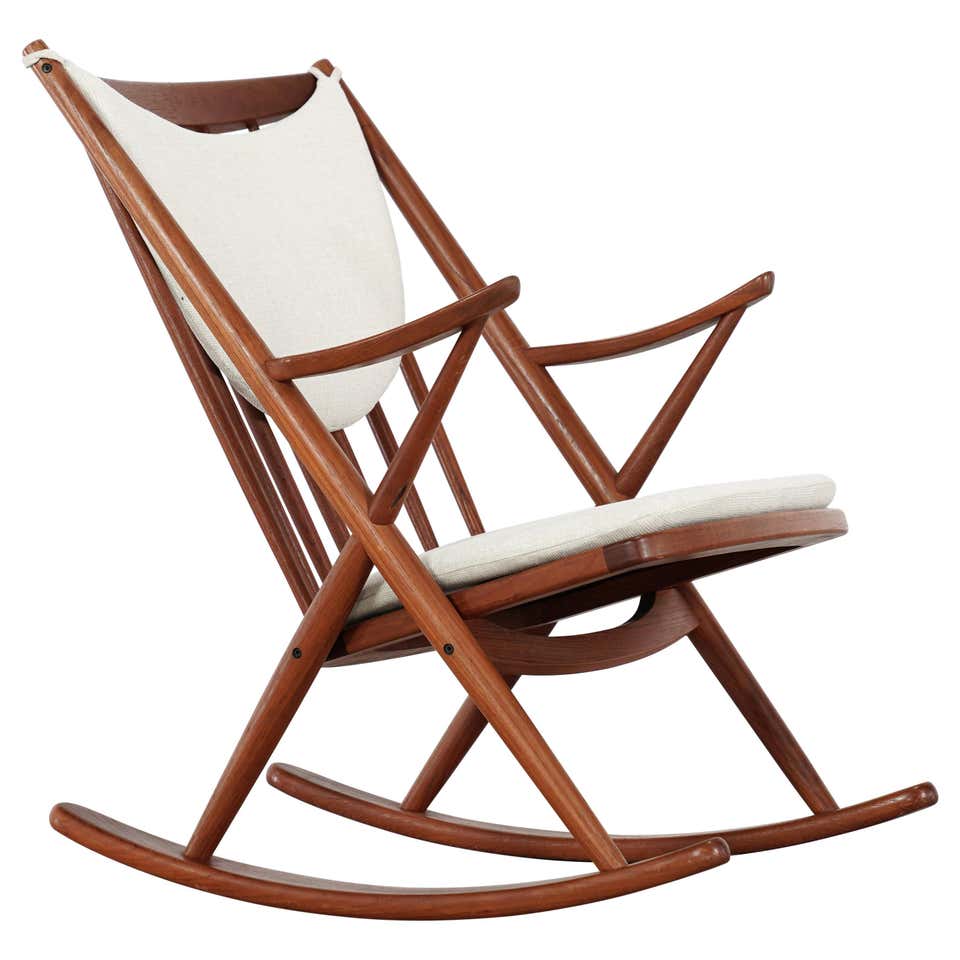
Back to weaving these seats...I imagine that in the not so distant future I will need to redo the seats on at least one of the chairs. Does anyone know how to do the Bramin style weave? I'm attaching pictures of the same chairs with paper cord that I have studied a fair amount but still haven't cracked the code.

First, do the warp cords---the front to back pairs. If you undo some of the weft (side to side) weaving, you'll be able to see how the front and back rails are wrapped between the pairs of warp cords. I suspect that they might be done with two separate hanks or shuttles of cord, alternating which ones go from front to back. The other way is to do all the warp cords, AND the wraps on either the front or back rail, then wrap the remaining rail in a separate action. But that will be clear when you undo the weaving.
As for the weft, you must use a cut length of cord--you can't pull it off the spool as you go because it has to go around and around the entire seat, woven on the top side and carried across on the underside with a couple of weaves through the warp pairs on the underside.
Looks like the weft is done in three separate lengths. You can see where the joins are on the underside.
The double weft cords are woven together. Let's say you start with 60 feet of cord (no idea what 1/3 of the total would be). Find the midpoint of that length and crimp it, then tack that loop to the inside of the side rail of the chair ---or however the original is anchored. Some people tack the two ends but I find that if you do that you can end up with a lot more kinking.
The top of the seat is the same as any other chair with this weave---just over/under, but then pull the cord all the way through. This is a big pain in the neck at first because you're pulling a LOT of cord through---but it gets shorter with each pass.
Keep the tension as even as possible! There's some margin for error on the topside but it might be a challenge to get a really smooth look on the underside. Get a 6" spring clamp to hold the cord in place on the rail once you get the tension just right--and then check it again before you move on. It's easier to get it right the first time than to go back and fix saggy strands later.
Knot the 2nd length to the 1st length as neatly as possible at the center line on the underside and proceed from there.
Check to see how the ends are anchored to the frame on the original.
Take lots of photos and notes when you undo the old weaving. And only do one chair at a time so that you always have an original to look at if you get desperate.
Thanks spanky! The only issue is that the chairs I have are not done in the same paper cord, but rather that 4 strand material, so I won't be able to use the existing seat as reference.
Also, looking at the photos of the ones done in paper cord, it seems like the warp cord pairs cross over or don't run completely parallel - easily seen with the exposed middle cords on the bottom of the chair. However, I think doing the second option you mention (doing all of the warp and wrap one of the rails separately) will work.
This is going to take a lot of cord - 3 x 2lb coils of 1/8" laced cord per chair? Do you recommend ordering cord from somewhere other than Frank's?
Ah, right--I see what you're talking about. One strand of each pair angles over a bit on the underside to where it will go straight back on the top of the seat. I can't visualize how the wraps will fit in with this---but that's because I am terrible at visualizing. If I have the thing in front of me, it's much easier to figure it out! I think once you pull out the weft cords at front and back, it'll be obvious.
I used to get cord from Frank's but then they got a bunch of inferior quality stuff. I talked to Mr. Frank on the phone about this and he said he had a source for better cord lined up, but I ended up switching to HH Perkins in Connecticut. Their cord is excellent quality and it does cost more BUT the shipping is a lot cheaper for me since I'm on the east coast, so it works out pretty well. That said---you can get samples from Frank's, I think. Then all you do is untwist the plies and unfurl one of them and measure the width of the paper. I've compared cord from various places this way and have found up to a 33% difference plus a difference in the weight of the paper itself. It seems like a little thing but using the best cord you can get can add years to the life of your chair seat, so it's worth looking into.
Frank's had some poor quality cord for awhile on 20 lb spools but that was 4-5 years ago. I actually snapped it when pulling it taut in a seat. They had a big and somewhat confusing selection of diameters the last time I looked.
I am terrible about tracking how much cord a given seat uses but Design-Restoration-Spares.com says 120 meters (2 lbs) is enough for a Wishbone, which has three layers of cord on the seat. I know a M
I'm about halfway along with the cord on this chair....does anyone have a recommendation as to which kind of knot will be best to add the additional lengths of cord when doing the weft? Also, would you attach the two loose ends of the already-weaved weft to the crimped end of the new length of cord?
I use a good old square knot to join cord ends. You can use it to tie ends after looping one end through the U of the new (double) cord, too--just make the knot sit a little bit ahead of the end of the U bend so that you minimize bulk.
If you pull the square knot really tight and then trim the ends close to the knot, it's pretty small---with single strands, anyway. I would not knot four strands together with one knot--too bulky.
Some of the other weavers here mentioned some other type of knot in a discussion quite awhile back but I don't remember the name and my knowledge of knot-tying in general isn't exactly vast. But this one works for me and it looks like what I've seen on old Danish chair seats.
Final update here. After a lot of learning and developing some good calluses, I finish my first weaving project. You'll see on the bottom that I didn't do a great job guessing how much cord would do 1/3 of the seat, so I ended up doing it with two lengths of cord instead. Overall, I'm very happy. Thanks again for all of the help everyone.


If you need any help, please contact us at – info@designaddict.com