
I've worked with Maharam Pebble Wool quite a bit and it's actually one of my favorite fabrics ever. I think it would be great for your needs! It's not at all itchy (and I find a lot of wools scratchy) plus the texture will help the seams to disappear. Steelcut Trio is nice but it's very smooth and not very forgiving so the seams will be very visible and you may also get little puckers at the curves. Tonus would be fine if you like the solid color look but it sounds like you want more texture and/or color variation.
I have made cushions for a couple of Reenskaug rockers. I used 2" extra firm upholstery foam for the seat and 1" firm for the back and the chairs were quite comfortable. The webbing has to be taut for the seat, of course. If it sags, even the best foam won't help.
I also think these look best when the cushions have rounded edges. This isn't as hard to do as it might seem, though you do need a steady eye and hand and a certain fearlessness with a razor blade. The simplest, cleanest way to do it is to first cut your cushions to shape, adding about a 1/4" all around on the seat cushion and nothing extra on the back (because it's thinner foam, you will only lose a hair in width and length after you're done.)
I use a razor to cut 1" foam and a serrated bread knife to cut thicker foam. Mark the outline with a Sharpie, then hold the knife or razor exactly parallel to the foam surface and start cutting. Don't compress the foam with either the blade or your other hand as you go, just let the blade do the work. If you can find one of those cheap little razor holders that turns it into a thin, flat knife, use that.
You can probably cut through most of the 1" foam with one pass. Thicker foam will take at least 2 passes and you'll have to do short little passes to get around the curves. Just be sure to keep the blade straight up and down, not leaning to one side or the other.
When you have your foam shapes out out, the next step is to cut a V-shaped channel into the edge. I posted illustrations of this in this forum a few years ago but I have no idea what they're in and the search engine isn't working right now, and neither is the image function. I'll do my best to describe it in words.
Hold the cushion on edge so that you are sighting down an edge. Cut a V channel out of the edge with a razor (you might want to start with a fresh razor--i usually change razor blades every 6-8' of cutting. It makes a difference.) Start cutting about 1/4" from the edge and cut at about a 45 degree angle towards the center of the edge. Mark the 1/4" margin along the edge if it will help you stay on course. The angle doesn't have to be perfect and the 1/4" margin doesn't either, just try to keep the original outline.
Repeat on the other side of the cushion edge.
Gently tear the cut material out of the groove that you've just cut; it will probably not be cut all the way through. You may need another pass on the 2" foam depending on how deeply you went with the razor (the holder thing helps with this). It's ok if the V isn't perfectly sharp at the bottom, Reasonably uniform is fine.
NOW---get some heavy duty spray adhesive. 3M Heavy Duty is great and Home Depot and those places always have it. Take everything outside, lay down some newspapers, put on some disposable gloves, hold your breath (or use a respirator), and spray it into the groove. Coat both sides well. Wait the recommended time and then press the sides of the V together. Et voil
Thank you so much, Spanky, that's fantastically helpful. I should've mentioned I retain the old cushions - not sure if they're original or not. They're pretty floppy and I hate the color, but I can use them as a template. The V-shaped cutting for the foam you describe is analogous to making darts in a dress, correct?
I've measured the cushions and come up with a yardage requirement of 1 1/8 yards of 54" wide fabric - does that sound about right to you?
Thanks for the advice regarding the fabric choice - I love the look of the pebble wool.
The current cushions have ugly rope ties. I like the idea of leather much better.
Well...the V channel is like a dart in that it's a V shape, but it's a continuous groove around the cushion, so that part is different. It's like a dart in that it gives a curve to a flat plane.
You can look for Reenskaug pics online to see if your cushions look like what are described as original, though I'm pretty sure not all descriptions are accurate, of course. But you can get a good composite idea. If your old ones are floppy, there's a good chance that they're latex foam and thus pretty guaranteed to be original. You could go with latex for the new ones but urethane is easier to cut and also latex is pricier. You can always switch later if you want---it is a simple process to replace foam. No need to remake the entire thing or get new fabric.
One and an eight yards of fabric sounds about right. Just be sure to have enough to cut generously. It's no fun stressing about cutting nice fabric when you have zero margin for error.
Yes, true about the fabric! I have a bad habit of getting just a tad too little, and then having to squeeze it out.
I don't know why the picture of the cushions didn't work. I think they are original, though, the fabric looks very convincingly early 70s, a sort of itchy, nubby wool in this rust-brown colorway that I doubt anyone would've picked by the time the decade was half over. It's just close enough in color and saturation to sort of blend with the teak frame; but ends up looking muddy. I'm also planning to clean and oil the frame using your method, so thanks again for the advice!
I finally got around to setting up a 3rd party photo hosting account so I can add photos until that function is fixed here.
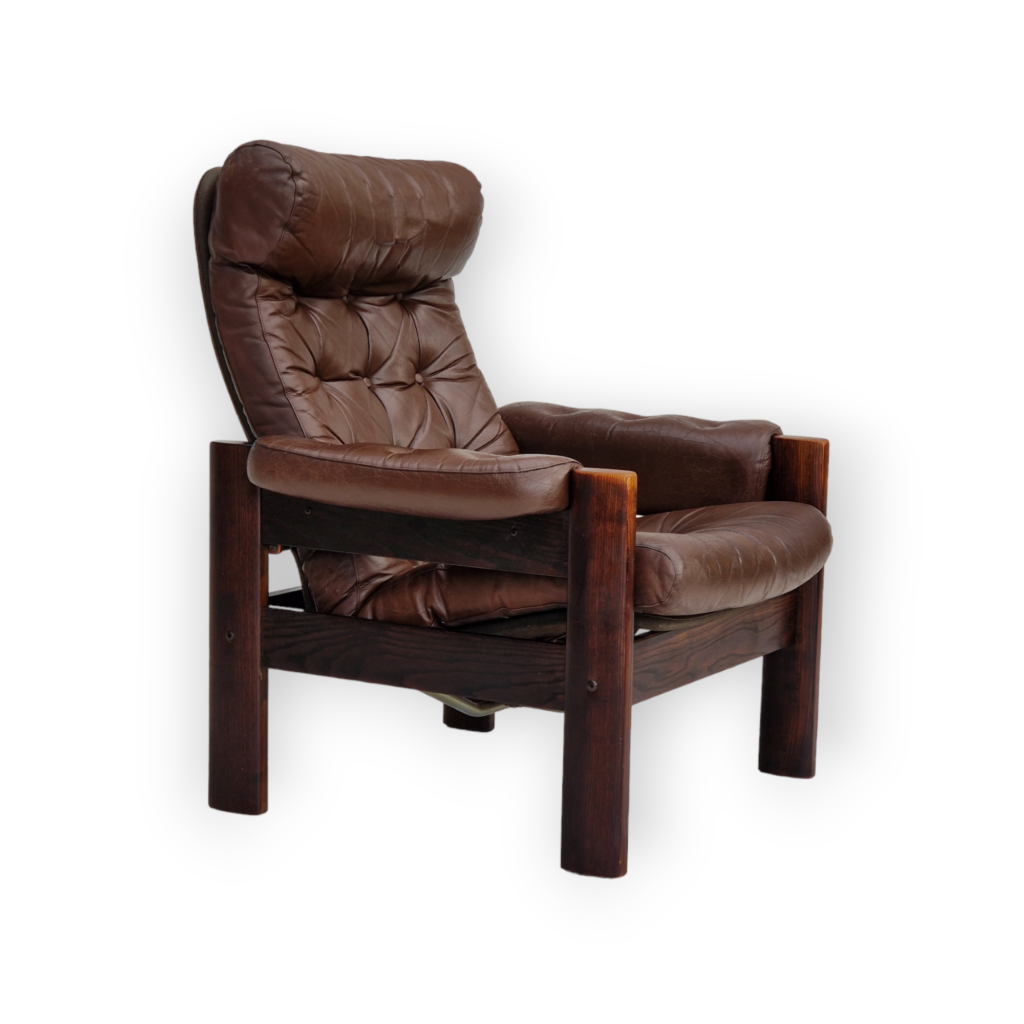
This is a Reenskaug rocker that I redid a few years ago using the V-channel technique to get a clean, rounded edge on the cushions. The seat cushion is a little on the thick side but that may be because I did a batting wrap on top of the 2" thick foam--I really can't remember! One inch thick urethane foam is a bit thin for a seat cushion (latex would be fine since it's more resilient).
-
And here's the diagram of how to do the V channel method. Again, the channel would be cut along the entire perimeter of these cushions.


If you need any help, please contact us at – info@designaddict.com