Hi,
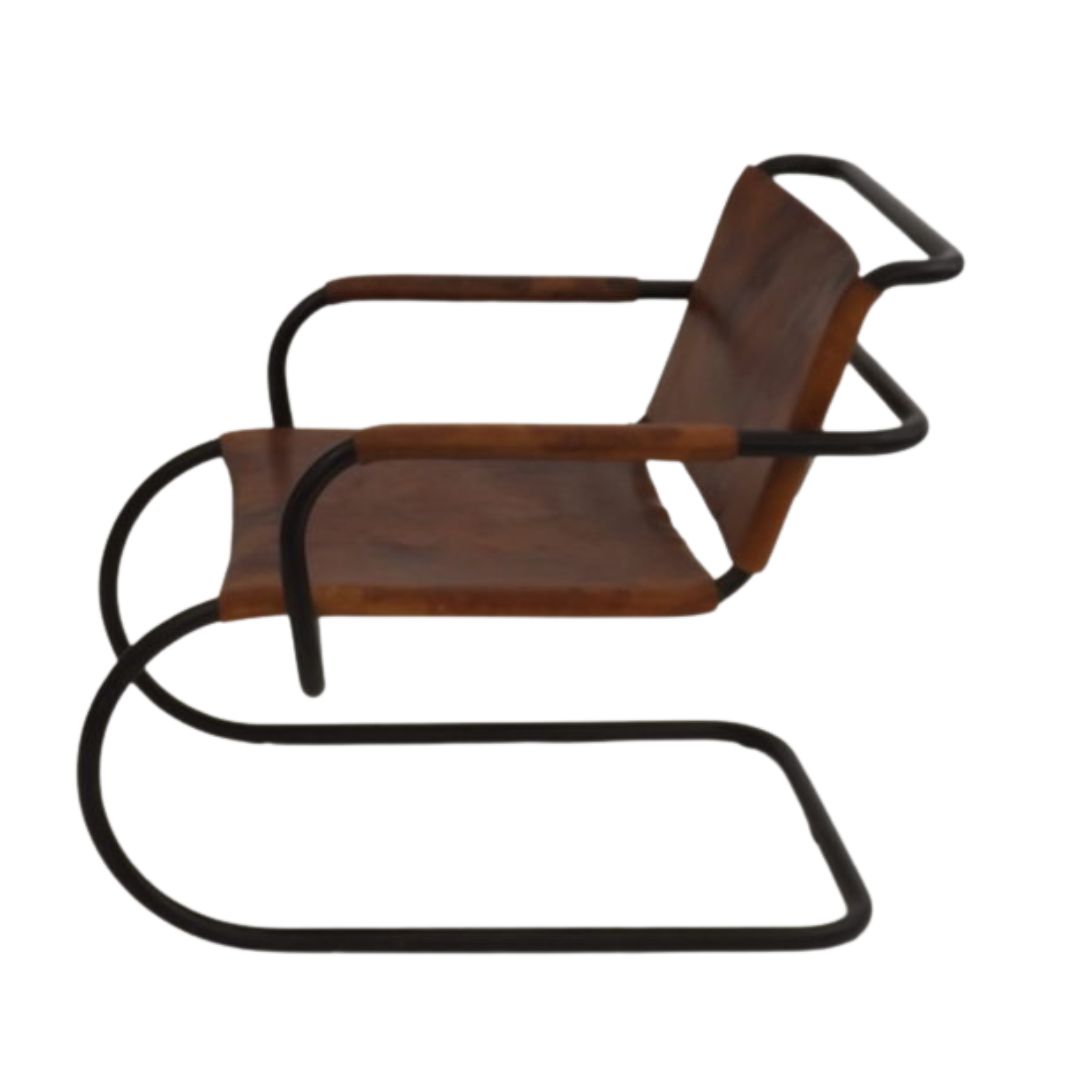
I just bought a Vodder rocking chair without it's original upholstery. I think it's a job I can tackle myself, but a little bit of advice from you guys would be appreciated.
What kind of webbing should I buy? What's on there now is definitely not original. I found an image of the underside of a newly upholstered seat, would that be a suitable match to the original and what is that type of webbing called?
Any help is much appreciated! <img class="wpforo-default-image-attach

The original webbing is Pirelli rubber webbing. Just get that, it's still available and it is best to redo a valuable chair like this with original materials.
I would just recommend that you use a pneumatic stapler. An electric staple gun won't drive the staples in completely, and it also uses heavier gauge staples which can actually split the wood over time. Tacks are ok but harder for a beginner to use on stretched webbing, and they can also split wood in this application.
If you're not sure about it, have an upholsterer do this part, including removing the old webbing. Or if you do want to do the stripping, at least get a Berry Staple Remover tool (google-able) so that gouging the wood is minimized.
Thank you Spanky, that's exactly the advice I was hoping for. I was really hoping it was something I could do, but by the sounds of it I might need to give it to a professional as I only have an electric staple gun. Although my husband has always wanted to get a compressor so now that I finally have a use for it, he might jump on the opportunity!
Do any of you happen to own this chair? If so could you measure the thickness of the foam? Please and thank you!
I don't own that chair but I can tell from numerous photos online that it has 1" thick foam. The seat frame is a separate unit and the foam has to be glued to the frame (but not to the webbing). It might also need to be tapered around the perimeter to get a clean rounded edge---kinda depends on the density of the foam and the weight of the fabric. And it looks like the seat frame unit sits inside the chair frame a bit so the fabric can't be too bulky, especially at the notched corners. You will have to do some snipping and trimming there, though not too much because you don't want any cuts showing, of course. Corners trip up a lot of DIYers.
The fabric needs to be stapled with very even tension all around the perimeter, otherwise the foam will be more compressed in places than in others and will look uneven. The fabric should also be glued to the foam, otherwise it'll just stretch across the curved frame like a drumhead. You have to use heavy duty spray adhesive for this. 3M brand is good, just make sure it's their heavy duty stuff. And make sure it won't bleed through your fabric. Most upholstery fabrics stand up to it---but not all.
This isn't like one of those simple upholstered dining chair seats that is an easy DIY project. If you're a meticulous and dextrous type, and willing to keep at it until it's right, you might be able to handle it. Even so, you might want to practice on some other stuff first.
If you do get a compressor, make sure it's compatible PSI-wise with the stapler you get. The Porter-Cable upholstery stapler is a very good one for the money, I think under $100 on amazon.
Spanky, thank you so much for the time you have taken to explain all of that. I really appreciate it! Perfectly clear and descriptive instructions.
I have only upholstered dining chairs before, but I feel I can tackle this because I am a "meticulous and dextrous type" with a dash of perfectionism thrown in for good measure!
The person who reupholstered it before was obviously a more creative, use what I've got type. The red string in the second picture has been used to attach what appears to be a linen belt to the crumbling webbing. The wooden drop in frame was then encased in an old t-shirt with the neck and arm holes sewn closed. And then the black vinyl cushion was covered with a pillow case, beautifully hand stitched closed. Definitely a unique look!
You guys are much too kind.
One other tip: when gluing the fabric to the foam, first lay it on and make sure it's centered and that the grain is straight. The latter is easier if you do it upside down, but just make sure the fabric doesn't shift when you flip it over. A few T-pins will help keep it in place.
Once you're sure the fabric is positioned exactly right, fold one half of it back on itself and spray both the foam and the fabric lightly with adhesive; let that dry for half a minute and repeat once or twice. If you do a heavy coat on the fabric, you increase the chances of it soaking through which you do NOT want. Also, make sure that all of the face side of the fabric is covered. Spray adhesive doesn't always go exactly where you're aiming. (Check the nozzle often and clear buildup off it as needed.)
Let that air dry for a few minutes, then carefully smooth the fabric onto the foam from the center line out, making sure there are no bubbles or creases. Missteps are hard to fix because the stuff grips right away and will pull foam off with it if you try to undo it.
Repeat with the other half.
Oh, also--you don't need to glue the fabric to the entire surface of foam, just to maybe within an inch or two of the top edges. The rest will smooth into place when you stretch and staple the fabric to the underside.


If you need any help, please contact us at – info@designaddict.com