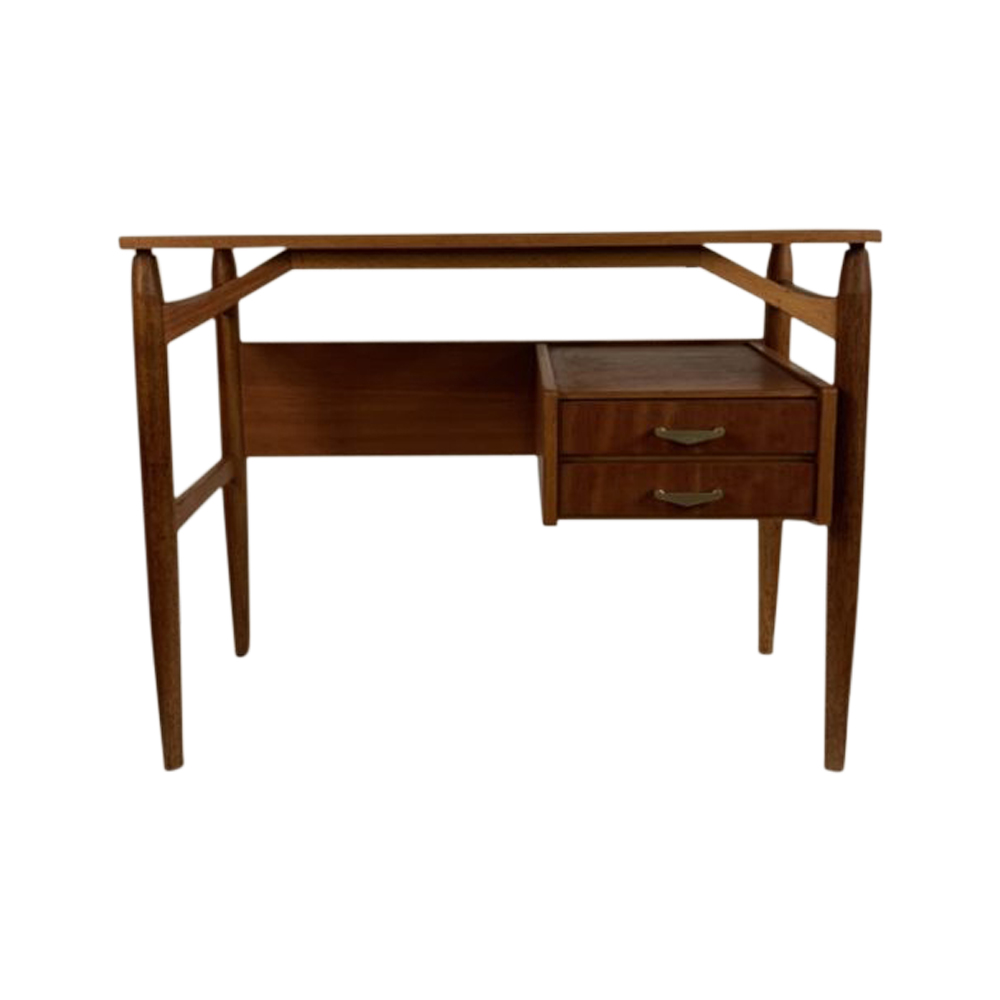
I recently purchased this desk. It's very lovely but it needs some work. Firstly, I'm curious if anyone knows who made it? No markings anywhere, yet it is very well made. I've only found a couple like it online, neither of which were identified.The two main issues with the desk are the lack of edging around the floating top, and the broken veneer on the bottom right drawer. One of the pulls is broken off, but this shouldn't be difficult to fix. Any suggestions on the edging? Am I just going to have to have somebody manufacture it for me? It isn't veneer edge-banding... it is angled, cut trim. I've included a couple nicer pictures of the same desk to give an idea.The broken veneer on the drawer... any good suggestions? I was just going to fill it and dye in the grain, but if there is a better way, I'd like to know. I don't think replacing the veneer is going to work.Lastly, should I consider dying the top to match the base? It is considerably lighter in shade. The veneer is very thin, so I don't want to mess with it too much, but I'd like to explore options with that.Thanks!Oh, also... any ideas on what size key this uses or where I could get a replacement? <img class="wpforo-def
Simplest first. Any locksmith will either have a stock skeleton key or can cut you one if your lock is not quite common.
Drawer veneer: you can replace the veneer on both drawers. This might be your best option. You can fill the voids and paint in the grain pattern. This is probably the most common solution. Some people are very good at it. (I am not).
Edge banding: this actually strikes me as easy: acquire teak and cut edge banding to match existing specimens. Clean old glue off, re-glue, clamp tightly, lightly sand refinish. BUT: there is a huge unanswered question here: why did the edge banding fall off in the first place. This is not normal at all (at least not on all four sides) Were it my desk, I would want to understand why it failed the first time so as not to see it fail agai. Perhaps more close up photos would be helpful. Someone here probably understands what went wrong if they can see better photos. Perhaps there is no concern, or perhaps there is something else to address.
Finally, the color on the top can be corrected with oil. Teak oil may be all you need as it has darkeners in it.
Thanks for the replies. Lief, I expected you'd have good advice. I had not considered replacing the veneer on both drawers. I will have to investigate this and keep it as a backup plan in the event that my fill-n-dye attempt goes south. Any reputable venders that you would suggest shopping for veneer from? I really like the grain on these drawers... they all four match. So maybe I'd do all four? Eh.
The edge... yeah, I will just have to have somebody cut the pieces for me and I will will finish them to match. I have one of the short edge pieces, and the end/corner of one of the long ones, so I know exactly what I need. The person I purchased it from said that one piece was broken off when he himself purchased it. He removed the remaining edges with plans to replace them all, but never did. He had some strips on trim from Lowe's or something that he was going to try to stain to match, but I'll just have real pieces cut.
Would you advise stripping the top? It gives me the impression that it was varnished, especially when I look closely at the pieces of edge trim that I have.
I will try to take some of my own pictures (the ones above are the seller's) and give you a closer look at what I'm dealing with.
It is very odd that the edge banding fell off. What is the substrate of the top? Is it a solid wood (laminated strips of pine perhaps)? Or is it something dimensionally stable like particle board or plywood?
If it is solid wood, that would explain why the edge banding came off, and you might want to think about some other approach, as it will pop off again on the two sides with substrate end grain.
If the top has been varnished, stripping it would be a perfectly acceptable approach.
Unless you're experienced with veneering, consider the paper-backed stuff from specialty vendors. You don't need much, but color and grain are everything, so, yeah, seeing it in person would be ideal.
As for the edge banding, attaching it is the least of your problems. Trimming the top edge flush without going through the existing top veneer is the tricky part.
Ideally I won't have to trim? If I get pieces made to made the one I have, I can just glue them on. The edges are angled down, so that the bottom width is maybe a 3/4 of an inch, where the top is about a 1/4 of an inch, or thereabouts. So I would strip the top, glue the edges on, sand lightly smooth, and then oil or varnish again. I may just decide to consult whoever makes the pieces for me to see what they'd charge to deal with the veneer. I know a speciality furniture maker and refinisher who can probably find what I'm looking for. Thanks all for the advice. Nobody knows who made this, huh?
How do you get a nice clean straight and square edge to glue the edge banding onto? I keep thinking that the top will need to be run through a table saw, trimming 1/16 off, to get a decent edge for gluing.... What am I missing here, tktoo?
In the past when I have replaced edge banding I dealt with tktoo's problem of trimming the edge banding flush with the exisint veneer WITHOUT sanding through said existing veneer by putting a layer of masking tape over the veneer and very carefully sanding the edge banding down the masking tape, which protects the veneer giving me extra room for error. Then I took off the masking top and sanded the rest of the way very gently and with fine 220 grit sand paper.
Hmmm. These are things I had not considered. Perhaps I could just sand off the remaining glue around the edge? Also, wouldn't it be easier to glue the edge pieces flush to the top and then sand, if needed from the bottom? I will have to take a picture of all this soon because I feel like either I'm an idiot or am not making this clear enough. Thanks, ya'll...
Not to turn this into another esoteric woodworking thread, Leif, but there's often more than one strategy or technique that will get most operations accomplished.
A fresh edge is definitely preferred and in this case I'd likely use a big-ish router with a 1/2" dia. down-cut spiral straight bit and a straight edge guide. Mostly because this wouldn't require removing the top or wrestling a large heavy piece like that around a table saw. If my shop were larger and my table saw surrounded by acres of extended support surfaces like the place I used to work had, I might be tempted to do as you suggest.
I'd probably also glue the edge banding on oversize and square, then shape and trim in place. It'd sure make clamping a lot more straightforward. Then, again, I'd reach for a router with a simple base-plate jig to trim the top surface of the banding to within a few 100ths of flush.

They do it because they want to and believe that they can, I guess. Most of them can't and do a bad job or give up and fail, but it's how you're going to learn. In my case, I don't have years of experience but I do have some and I like challenges. I was just putting it out there in the likely event that somebody who has been here before would have useful information. Thankfully, they have plenty.
I can router the edge no problem. It's a pretty clean separation so I don't think it will be too complicated. While I'm ordering veneer, if I go that dirrection, would it be prudent to simply order a new piece for the top, also?
I'm not at all beyond taking this to the guy I take things to when it's beyond my scope... just thought I would at least narrow down the list of things for him to do, if I can.


If you need any help, please contact us at – info@designaddict.com