I had posted a recent acquisition of 4 Wegner CH30 chairs in the "Last thing you've acquired" thread a month ago, and finally got around to doing a dedicated thread. Rather than start explaining from the beginning, I'm copying/pasting the relevant posts (with photos) from that thread as the first few ones for this thread, and will then post new info afterwards.
posted by: cdsilva - 17 Jan 2016
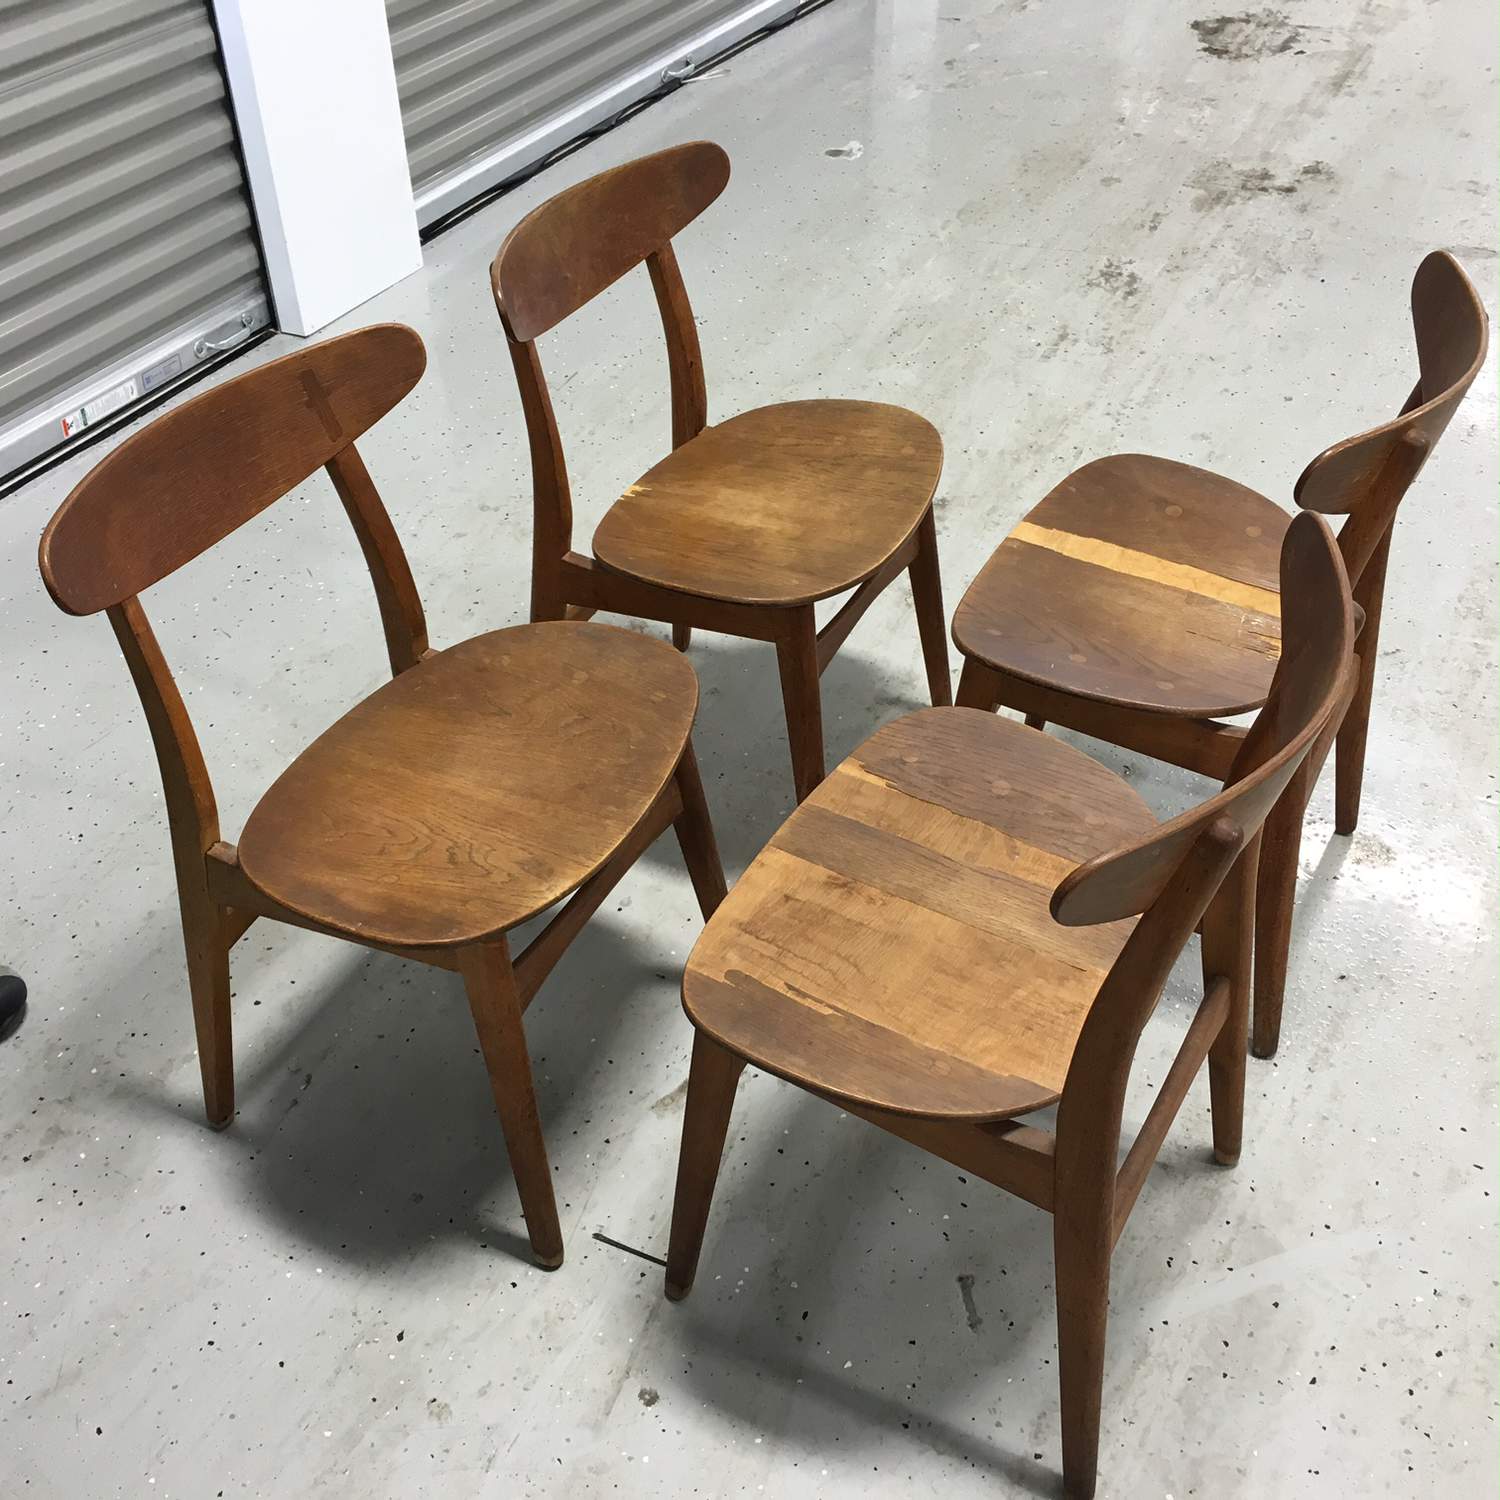
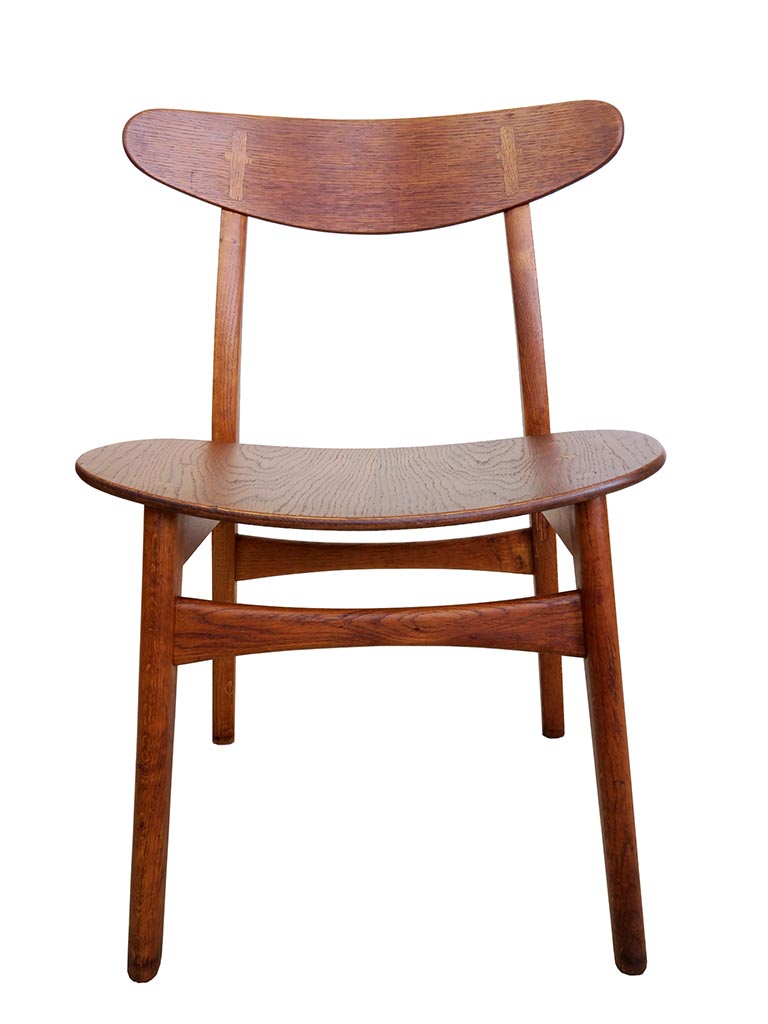
Set of four Wegner CH-30 dining chairs. While they are the desirable wood seat versions and the frame members are still in good structural shape, there is unfortunately significant veneer loss on three of them. The initial plan is to add foam and upholstery over top of the damaged veneer. I may hold onto this set for a while in the hopes of finding a solo CH-30, so I can swap that one in the set and keep the good wood seat one for the personal collection.
posted by: cdsilva - 21 Jan 2016
leif, if I knew anything about re-veneering pieces that large, I might try it. I've read a few threads from some of you woodworkers on DA about large sheet veneering, and it sounds a bit above my pay grade. And although I haven't yet had the chance to clean the chairs, I did take a closer look at them and think they are the all-oak versions, rather than teak veneer for the outside faces of the seat and backrest. And if a miracle were to happen, and I was able to successfully re-veneer all four seats with white oak, would it not be very difficult to get a visual match to the aged oak veneer of the backrests? On the "go for it" side, since the original plan was to upholster the seats, I suppose a botched re-veneer job would be just as easy to cover up.
posted by: leif ericson 21 Jan 2016
I think that there is actually a very simple tool that will elevate your chances of making those round veneer plug to 1000:
A veneer punch:
http://www.joewoodworker.com/veneering/dealingwithveneerdefects.htm
http://www.veneersystems.com/index.php/action/category/id/5/subid/22/
posted by: cdsilva - 21 Jan 2016
Oh, also forgot to note that there are six circular veneer/plug caps over the screw connections to the seat rails below (the seats are not easily removable via screws on the underside). I think those holes were cut after the seat was laminated/veneered, with the plugs going in afterwards, followed by a final sanding then oiling.
The chances of me cutting exact holes in the new veneer to perfectly match are zero, so all of those plugs would need to be removed, probably with some damage which would require new plugs. Once again, the chances of me being able to fabricate perfectly sized new plugs to match existing seat holes and new oak veneer holes are very low.
The whole process sounds like it might be fun for a skilled woodworker. I got lucky on the small rosewood veneer repair for the Ditzel desk, but my recent effort to repair blistered veneer on a small Vejle Stole table was a disaster. I don't want my veneer repair record to dip below .500.
posted by: teakhound 25 Jan 2016
cdsilva – Really excited to see what you do with those Wegner chairs. Though I realize it is no skin off my back, I say go for it – drill out those seat plugs, remove the seat bottoms, reveneer them, cut holes in the new veneer for new plugs, and make new plugs. Sounds like a really fun project.
posted by: cdsilva - 25 Jan 2016
teakhound, I'll probably start a separate CH30 restoration thread soon, but here's a little sneak peak for those of you interested in 1) the joints, and 2) what's behind the plugs. I know there was a thread a few years back that talked about what's behind the "cross" plugs in the CH23 chairs.
The worst veneer damaged chair had loose front leg joints, so I started the regluing effort yesterday. Since the front seat screws/plugs are directly over the front legs, the screws need to be removed before the legs can.

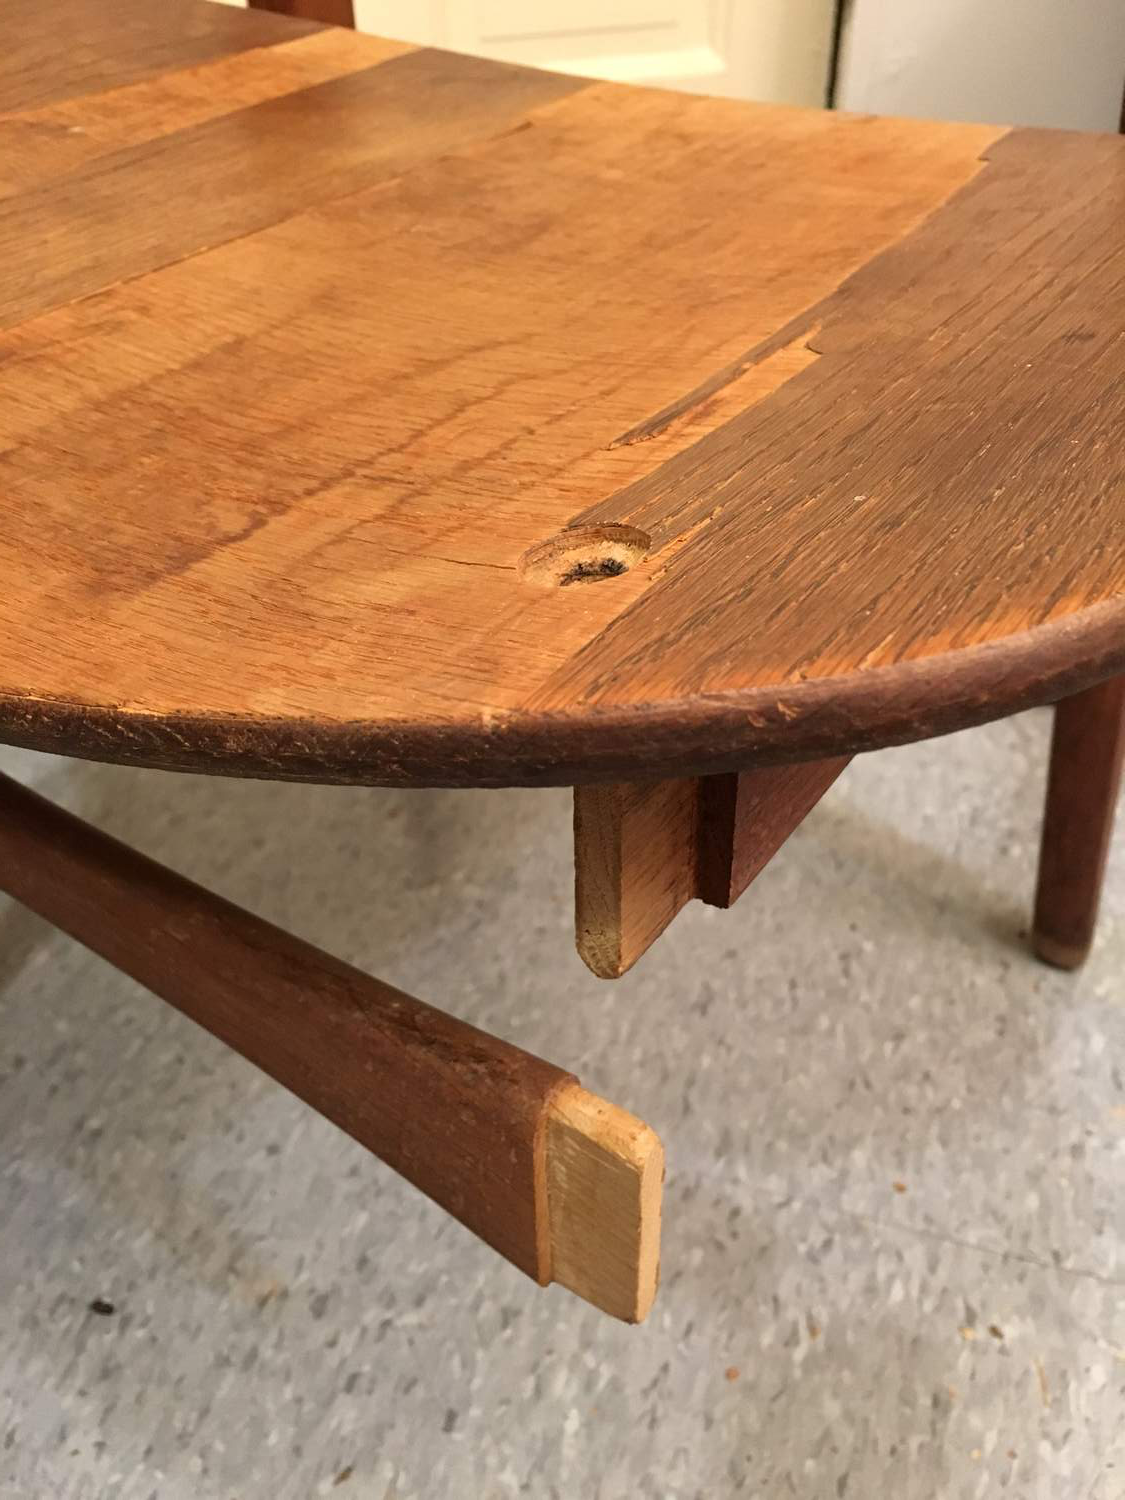
posted by: cdsilva - 25 Jan 2016
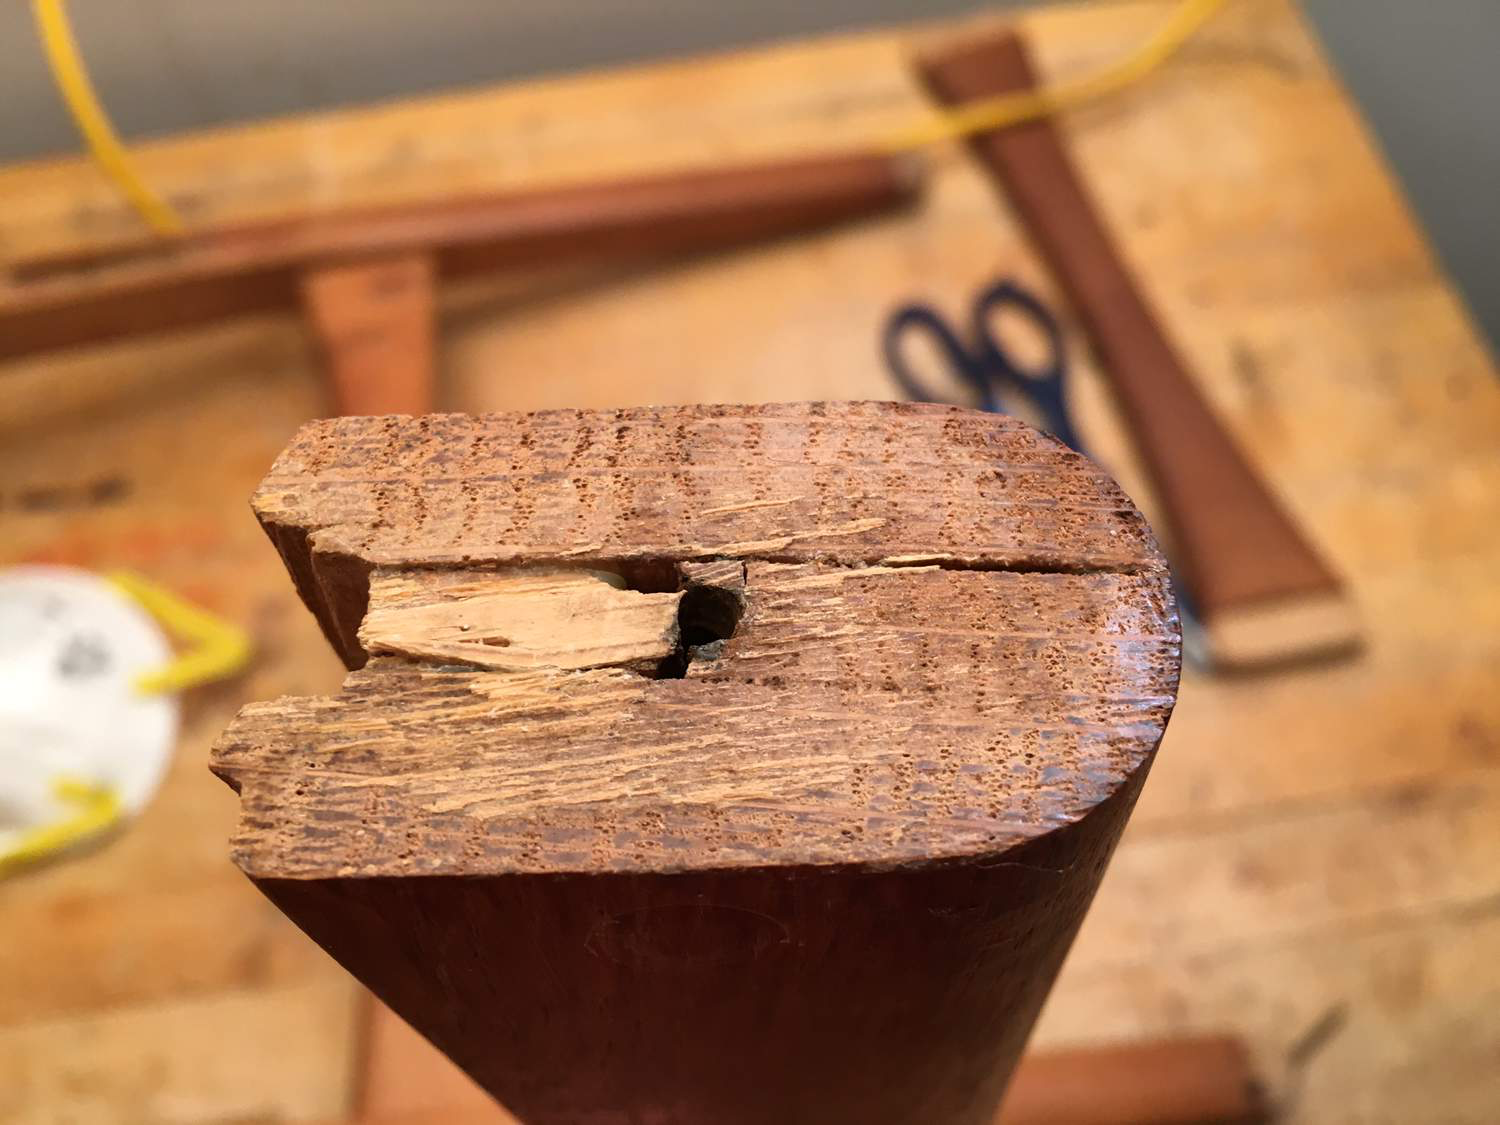
Actually, no. The tenon on the side rail is notched at the top (see last photo), so that the leg mortise has a "top". So the screw goes into the end grain of the leg in an area with not much wood bite. Unfortunately for me, the loose leg joint involved something getting loose there, and the screw kept slipping and would not come out. I suppose I should've drilled into the screw and taken it out that way, but I went straight to the rubber mallet and ended getting the leg off with a wood break to that top part of the mortise. I have already glued that piece back in and will need to add some addition splinters to the screw hole to get its grip back.
posted by: leif ericson - 25 Jan 2016
That is called a haunched tenon (when it has the side notched out as you say), which doesn't matter much, but...
This is very surprising that it would be designed in this way. The screw was slipping because it was in end grain, and screws do not hold in end grain. The threads cut the fibers in the wood and the screw pulls out with a fraction of its expected strength. Or just spins in the hole because the because it has cut and broken off everything it bit into. This is why wood cross dowels are inserted into stretchers on knock down furniture. The screw looks like it is going into end grain, but it goes through the cross dowel, which provides all of the bite.
But back to your chair, if that screw were moved back just a bit it would both go into the side grain of the tenon, and lock the tenon into the mortise.
It is extremely hard to imagine that Hans Wegner would have designed it with a basic mistake like this, especially given that such an elegant solution is so nearby.
Is there any chance that the seat was put on a bit too far forward? Either later or originally? Or that the plug in the seat was cut too far forward? Or the tenon was cut too short (there would be too much space in the bottom of the mortise). Or that the seat is not original? Or the screw was inserted at the wrong angle?
There is more to this story I am sure of it.
posted by: cdsilva - 25 Jan 2016
leif, I agree with most of your comments/questions, but unfortunately, have few answers for you. Here are a couple of shots of the leg top that I took this morning. I believe the plugs were original and first time the screws removed, so what you see would have been done in the factory. If longer screws were used, then they might have passed through the mortise top and into the tenon. However, due to the curvature of the seat and the angle of the front legs, the screws are not going in exactly parallel to the leg axis.
The explanation I came up with was that the front screws are only two of six for the seat, and experience less loads than a frame joint, so screwing into the end grain might have been an acceptable condition.
Note that some of the seat wood is attached to the top of leg, so it might be a bit confusing as to why there is wood grain in the opposite direction. I believe this is the result of the previous owner attempting to fix the loose joint by trying to squeeze glue into a gap while still assembled. A few of the chairs have old dried wood glue drips and runs along some underside joints.
Sorry to others for the thread hijacking. I'll start the new thread soon and transfer these comments.
And now back to present day . . .
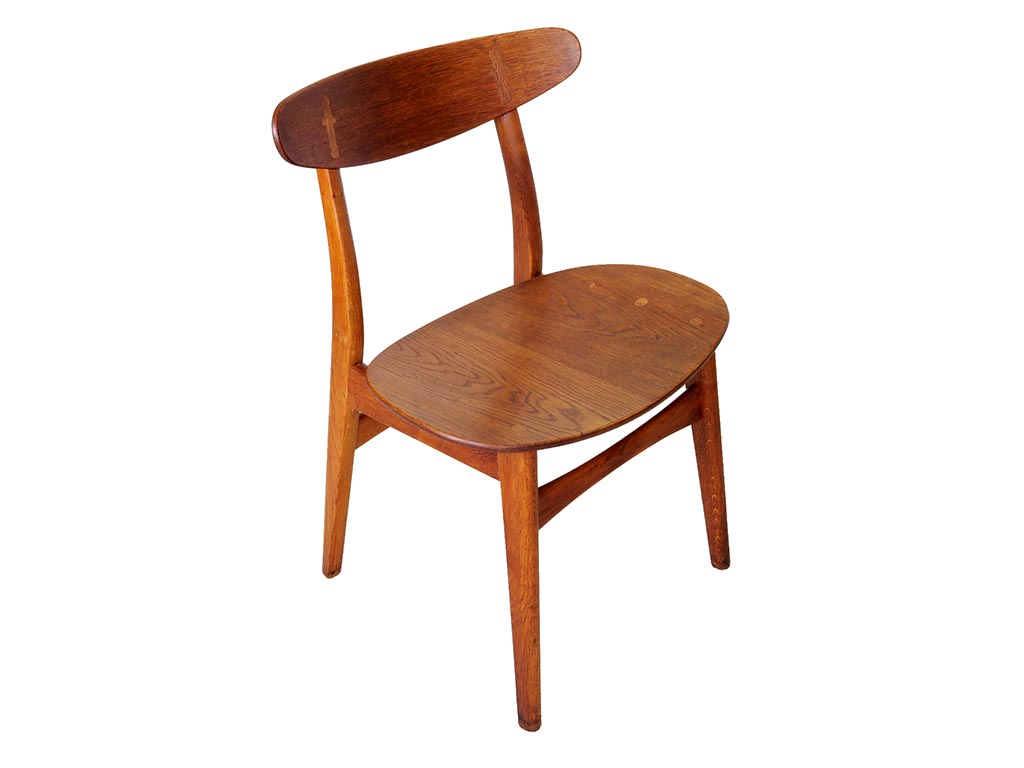
Last weekend, I finished the first stage of the restoration, which involved re-gluing loose joints and reconditioning all of the wood as if there were no veneer damage.
I'm happy with how the results turned out. Since the second ply of the seat is also oak, the oiling and waxing darkened it up a bit so that the veneer loss is not so noticeable.
A few before shots . . .


If you need any help, please contact us at – info@designaddict.com