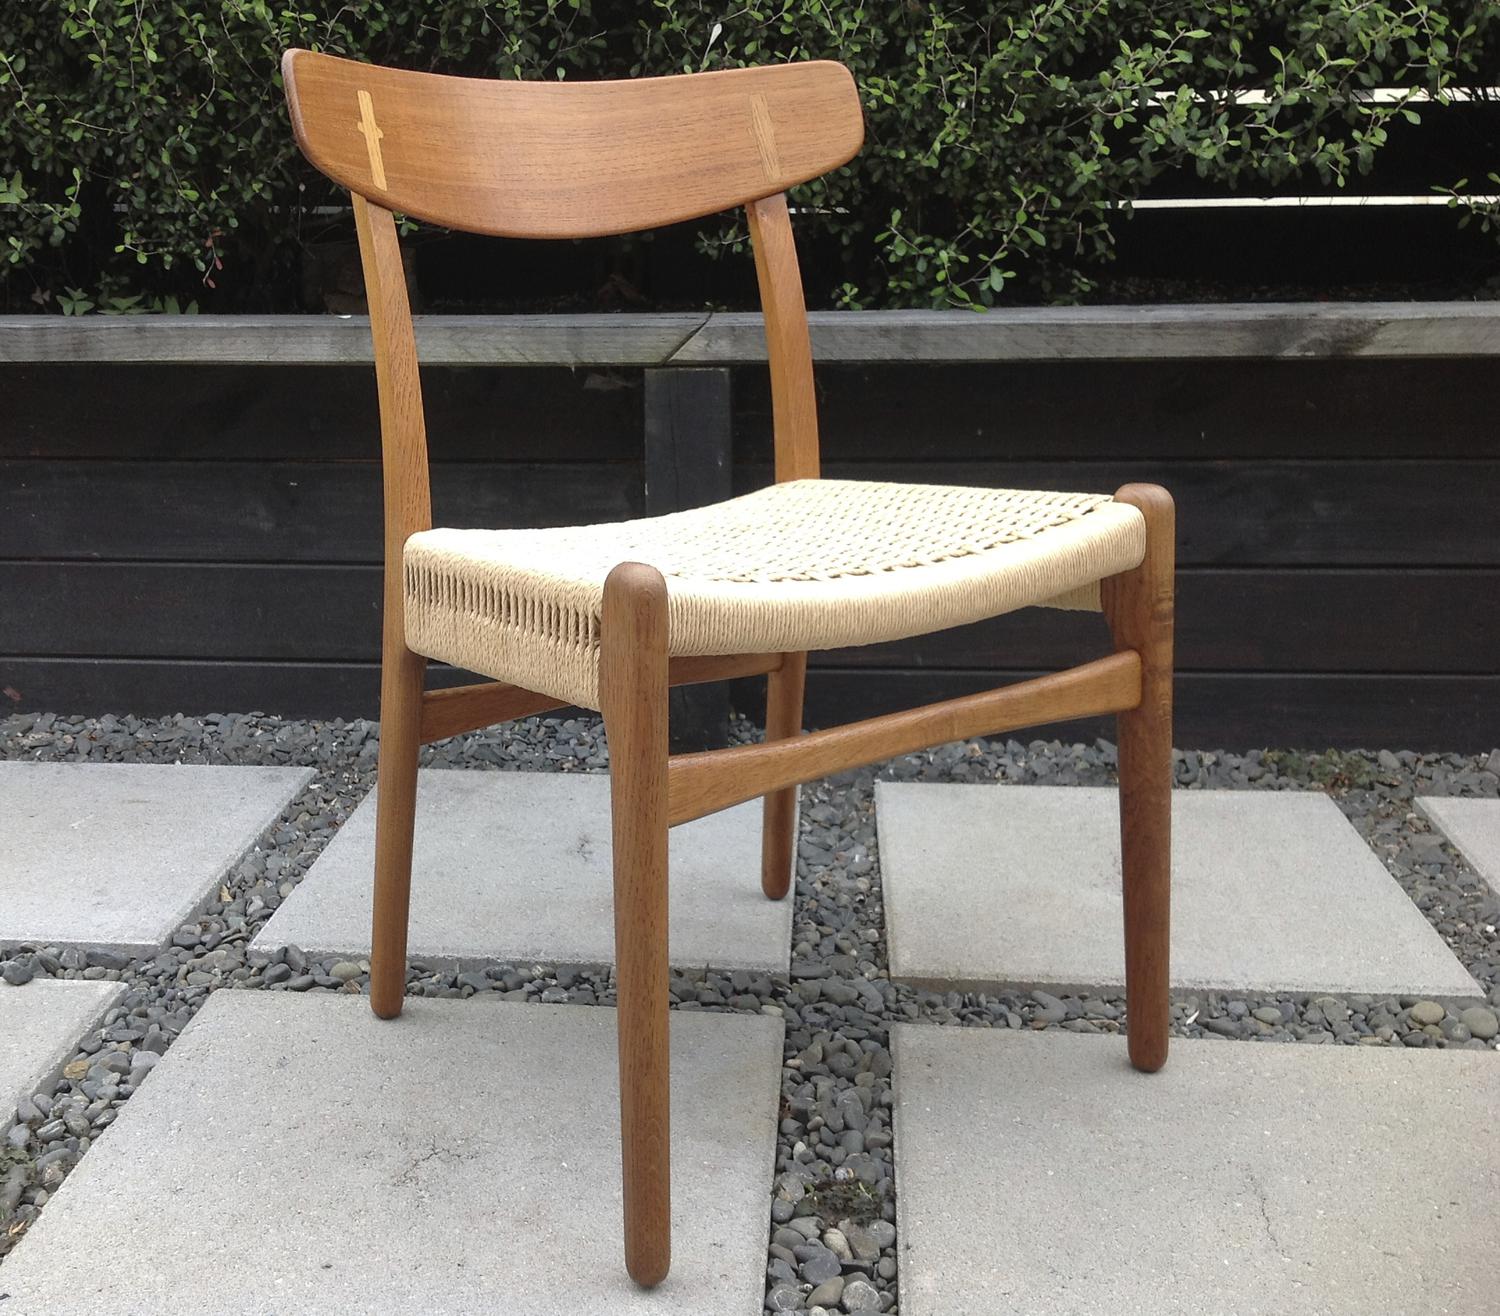
I am excited and scared at the current moment! i just picked up 3 Niels moller model 56 dining arm chairs with danish cord in bad shape for a total of 30$ (20$ for the decent one and 5$ each for the poor shape ones) was driving back from lunch and stopped in a thrift store i dont normally go to (found a single russel wright plate) I was cutting back through some very depressed neighborhoods to get back to the main road and i spotted what i thought was a moller chair on someones porch. Pulled over, went on the porch of the older row house (kinda scared i might add) and knocked. no answer. not sure if anyone even lived there. went to the neighbor house and knocked, no answer. walked back to my car and started writing a note to leave when the neighbor walked out. (she spoke very very little English) when she finally got what i was trying to say she showed me the phone number for the person with the moller chair. i called, she answer and i made my odd request and she said her husband would be back in 10 min.The ladies husband was there and i said i wanted to buy the chair on the porch. He said 20$ and i paid him. when i was about to leave he said if i would be interested in the other two? I was like other two?! (thinking maybe inside the house and in better condition) he walked me around the house to them just sitting on their sides on the ground with nothing covering them except a tree. He said how much would you pay for these since they were in much worse shape. I threw out 5$ a chair and he was ok with that.While loading them awkwardly in to my small coupe trying to make all 3 fit, i asked where the guy had gotten the chairs from, and he responded, for free, as him and his boss cleans out junk from houses on the side.SO now to point! i have 30$ into these. I have never done danish paper cord but have a book on it as i have been wanting to learn to do it.The one from the porch is not in bad shape. still tight joints and no cracks. needs alot of sanding to clean the teak but i can restore it with my skill level. ON THE OTHER TWO, i have never refinished something this bad and some joints are loose and the tops of the chair backs have cracks from wood swelling. Should i break apart the chairs and clean them up and then re-glue. how do i break still tight glue joints and what are some tips and tricks to danish paper cord that you have leaned from experience from doing it that might not be in the books. thanks fellow design addicts <img class="wpforo-d
Start with the worst one by going ahead and removing all the cord to better assess condition issues. Do all your experiments on that one. Loose joints will usually come apart without too much coaxing. A bar clamp that can be reversed to use as a spreader comes in handy. Just work slowly applying even pressure so as not to break tenons and dowels or otherwise deform the components.
There are extensive and excellent threads on weaving danish cord seats archived on this forum if you look.
You'd be surprised at what an oxalic acid treatment or two can do for weathered teak. Sometimes "deck brightener" from the big-box home improvement stores is the cheapest source for this. Teak restoration products from boat suppliers are basically the same at twice or more cost.
i have found a few writeups about the danish paper cord on here and a few other sites that i am doggie earing for a latter read.
what do you do if the joint is cracked but still very tight?
another thing i am worried about is the rusty paper cords hooks, i feel i am going to break alot of them while bending them to opena and close them. should i just go ahead and replace them all?
Nice pickup. Are you set on cord? There's always the option for converting to upholstered seating (elastic webbing + foam sheet + upholstery of choice).
Looking forward to seeing the wood restoration. Post some closeups of the damage that you mentioned. I usually leave stable cracks alone. Once there's movement in the crack, then it goes to a case-by-case basis.
On a slight off topic, I'm currently in the middle of fixing a snap break in the leg of a Moller 75, the side chair version of this design. I'll eventually post step-by-step photos of what NOT to do (but I did anyway).
It might be a good idea to let the chairs reacclimate to a stable indoor environment before disassembly. That could take a month.
Sometimes a good rap in the right direction with a hammer is all it takes to break a not-quite-yet-failed glue joint. Use a block of softwood between to prevent denting the teak. If a joint seems intact, though, you might just leave it.
The L-nails are a judgement call. You might end up breaking more trying to remove them all than just replacing the odd failure here and there. See how it goes.
I've completely disassembled and re-assembled a few Møllers. So I can say it is certainly possible.
When I need to separate joints I've borrowed a trick from somebody here (tchp? cdsilva?) and started using a steamer (like for cleaning or removing wrinkles from clothing). It really softens PVA glue a lot. Just aim it at the joint for a while. And then nice even gentle pressure to ease it apart. Or possibly light taps with a mallet.
The clean off the old glue very well, dry fit to make sure all the joints are tight, glue, and clamp. Spend a bit of time planning your clamp job before hand. It is very important for the strength of the joint.
Oxalic acid is an excellent suggestion. I would possibly start with it and see what problems remain. Then go to more oxalic acid or sanding. You can get it in a plastic container at Sherwin Williams paint stores in my area with the "Wood Bleach" on it. Somewhere on the container it says it is "oxalic acid" in small print.
I would remove the rusty L nails. Some places sell electric wire staples clipped in half. They work, but the real L nails are nicer to work with, and less sharp when you are weaving.
thank you everyone for help and sugestions.
i deff will keep it updated with progress once i make progress! projects can be slow at times!! but they will be left inside to stableize them and also i am going to picking up some wood bleech for sure
thinking i am going to be replaceing all the L hooks with new as i do not think i am up to date with my tetus shot...since i read that your hands will take some abuse and rather not get lockjaw
how much cord will i need per chair? i saw 2 pounds of it for 35$. laced and unlaced. i think mine are laced since i can see the twisting correct?
cdsilva, you should sell me the moller chair so i can have somewhat a set of 4!
Laced and unlaced are virtually identical in my experience. And I believe 2 pounds about does a chair. (I got an enormous roll a while back and I've been using it forever, now).
I believe Spanky posted about getting some rather thin cord from somewhere and I would try to avoid that if possible.
Tktoo's advice about letting the chairs re-acclimate to indoor humidity is a very good idea that I strongly second. Disassembly and reassembly thought that process could cause problems.
Also, forgot to mention that Møller chairs have tenons on two of the seat rails and pegs on the other two. I can't remember which front and back have, and which both sides have. BUT the result is that the pegs go through the tenon of the other rail in each leg, and lock it into place. So you have to remove the peg side first. Make sense?
If my chair was solo, I'd happily sell it to you (except your set really wants a fourth 56 arm, not a 75 side).
However, my broken chair is already the fourth of a set that I have, of which the other three are in excellent shape structurally. I had been keeping an eye out for a similar patinaed replacement 75 before starting the cleaning/reupholstering, but finally decided to attempt the repair and see how it went. Should be able to finish it up this weekend. I'll go ahead and post photos in this thread if okay with you.

The best deal on true Danish L nails that I found is from The Caning Shop in Berkely, CA. I got some and am happy with the quality.
Get some angled pliers with spring-loaded handles for removing the corroded old nails. They are likely to break off in the wood, just so you know---you might have to pre-drill all new holes.
Pretty much everything you need to know about weaving the seats is in those other two threads on this board. Read them through and then refer back to them peridically when working on the chairs. There's so much information there that it's hard to remember it all once you get going.
OBSERVATIONS:
-So i spent some time today undoing the papercord on the 2 worst chairs. i used a serrated bread knife and cut most of the papercord off and then started bending the L nail heads, Wht happened was that the nails did one of two things; head immendilty snapped off with little to no pressure or the nail came complety out of the hole. there were a very few nails that didnt break and stayed in their holes but it was a rareity. i am missing one danish control emblem and the other 3 came off with no effort (for safe keeping)
-one chair is still pretty structurally solid with no loose joints and one split where the back rest meets the upright.
-the 2nd chair was much worst. one tennon was completly broken and the cording was keeping it semi- stable and the joint at where the back of the armrest meets the chair upright support and also where the backside of the side strecher on the same arm area are loose. the strechers have kinda large swelling cracks also.
REPAIR QUESTION:
to stabilize the swelled cracks as well as the swelled splits on the strechers from the nails, should i fill them with a pigmented epoxy after i have finished bleeching the area and sanding? tape off the crack to fill, fill it, let dry and use a spoke shaver to trim off any pertruding expoxy and then sand?
all of the pictures are of the very worst chair. sorry for the crazy depth of field photos. i was shooting at a very large aperture on my camera as it was very dim outside and i was not trying to bump up the ISO.


I wouldn't use epoxy. Oil will not soak in and you are extremely likely to have a color mismatch when it is all done.
On face grain tktoo shared a trick a while back in which you take a V gouge and carve a channel out along the crack, then carve a donor piece of teak out of a new board and glue it in. That won't work on end grain.
I would consider using a putty of elmer's school glue and shavings from the chair. I would also consider breaking the wood open along the crack and gluing and clamping.
so today i went to practicaly every paint and home impovememnt store in my city looking for oxfolic acid. NOTHING! so i had to order off of amazon which is a bummer but hey, i have prime!
but...
i want to go ahead and buy my materials to have them when i get to the point when i need them. and i am on frank supply for caning. i am looking at (3) 2 lb spools of unlaced danish paper cord Plus i need nails.
Now franks's nails sorta look like cut electrial staples to me. can anyone tell me about there quailty? since i am putting in all new nails at least on the 2 bad chairs i want what ever is going to be the easiest and if cut staples are harder to work with etc i want to avoid them
also on the joints is it that the front rail has a tenon and the side rails have both a tenon with dowels pins on the tenon or does the side rail only have dowels pins? i drew a picture too if anyone that has taken a moller 56 or 75 can tell me??
https://www.youtube.com/watch?v=Z39dMrDBu8s
Not sure if you've looked at this video of another Moller chair weaving.
top of the list while seaching online but its very helpfull although a bit tedious at times.
Ive done several sets of chairs like yours and they are very rewarding at the end.
Like someone said - it could have even been Hans Wegner talking to the guys from Carl Hansen and son.
"Make sure you do it properly from start to finish" No mistakes no matter how small!
or was that Yoda? 'do or do-not, there is no try'
Hope that helps


If you need any help, please contact us at – info@designaddict.com