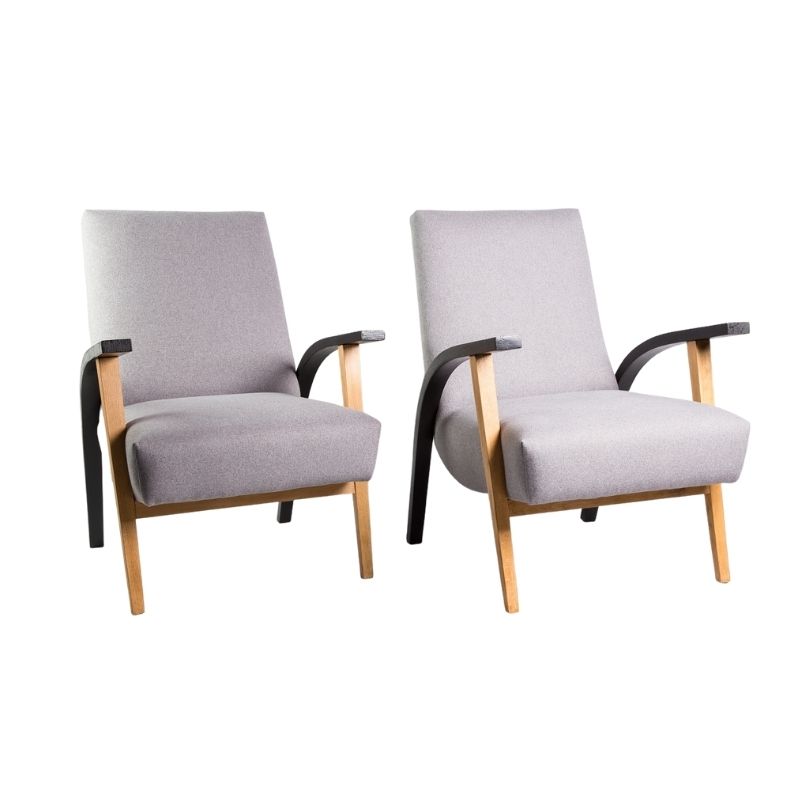
Okay woodies, I have a swan chair with only three legs. I am going to make the 4th.
1. there are 18 layers over a 3/4 inch thickness, so each layer is 1/24 inch (yes, I realize these were metric when first done). All are teak. The current availability thickness wise is a 1/42inch standard. Some thicker ones are too thick. Can I cut my own on a good table saw? Do I buy thicker and sand? How would I do this without destroying such a thin piece of wood? Wood glue or veneer glue?
2. For the jig, how much deflection can I expect (how much tighter do I need to make the curve than the original?)? Also there is a twist in the upper portion of the leg so that it follows the contour of the seat. It is slight (probably 5 degrees at most). Do I need to over twist this?

lucky you! I thought these we...
lucky you! I thought these were very very rare.
Probably easier to buy the veneer you need, take it to a cabinet maker and get them to run it through a thickness sander,won't cost much or take long. Do some experiments with finishes on some leftovers and put aside the two best colour matched pieces as face sides. Then cut all your layers slightly oversize (about 1/2 to 3/4 " wider and about 3 " longer.
Making the formers is a bitch, I hate doing it. I'd suggest getting a cad file done (trace the outline of the leg onto a big piece of paper and get someone who can use autocad to do the file, won't cost much or take long) and get the male + female parts cnc cut from a few pieces of 3/4' mdf or ply. For a one off I would just use very thin brown packing tape on the surfaces of the former,male and female, the last thing you want is glue bleed sticking the whole lot together into a bloody mess.
I usually use urea formaldehyde or poly glues, seeing as you'll have to manually spread you glue find something with a very long open time that is suitable for lamination, how you apply it might take a bit of practice...you can be fairly messy, just keep the formers away from you when you do it and remember to keep the two face sides (a wipe with some shellac on the outer faces before glue up will help prevent any nasty glue spots sticking) away from you until the end, clean your hands if you need to before carefully applying glue to the face pieces. I've found that two small tight rubber bands slipped over each end (one reason why to cut oversized layers) helps keep it all together whilst you get it into the formers. Then clamp it, starting at one side at ending at the other and keeping your layers horizontal, try and use one good quality F clamp every 3 inches. Remember to do all of this on a non stick surface, glossy formica works quite well.
Once the glue has set and a full 24 hours later (don't even attempt to test its flex beforehand) you can remove the excess, roughly file off the squeezed out glue. I use a router to clean up my laminated edges but it took a long time to work out how to do it well, it does a great job...there are ways, I'd google it, but if that fails use a hand plane or pay someone to do it...indeed if it didn't sound like you wanted to DIY I'd suggest paying to have it done.
Best of Luck!
PS Fine Woodworking on Bending Wood is a great little collection of articles.
PS Try screwing one part of t...
PS Try screwing one part of the mould flat onto the formica covered board, test that it is perpindicular to the board with a square.
I wouldn't worry about springback, with so many layers and a rigid adhesive it will be almost imperceptible...teak can be tricky to glue (oily) a wipe down with acetone and the right glue will help. I'm not sure what you mean by twist? I don't like to recomend it but a urea glue with a long open time is probably the best thing to use. Its a very tricky project come to think of it, reconsidering it I would just go with the commercially available thickness of veneer and work around that.
Earlier I envied you, now not so much 🙂
I wonder how the heresy of replacing all the legs with polished stainless flat bar with the same profile would look?
They only made these for one...
They only made these for one year in 1958 and were also making the standard versions as well, so I imagine they are quite uncommon. I have been dreaming about finding one for years with no hope, and then i find a matched pair! I like these so much better than the standard leg versions, The boimorphic qualities of the chair and legs match so well. They are like a sexy space alien bug getting ready to crawl across my living room.
Thanks so much for the imput. I will certainly report on the ongoing progress. And I am with you. If i thought for a moment that I could get a pro to do this small but seriously annoying project, I would pony up for sure.
There's a
wealth of info in Heath's posts. The only element of it that I'd directly question is the first bit, about easily sanding thin veneers in an abrasive planer (sander). The reason is that the vacuum that is applied to the sanding area of the machine will be almost certain to wrap the veneers around the hold-down rollers or the sanding head(s) themselves. The only recourse is to stick thin stock like this onto boards, which can be sent through the machine safely. So, using available veneer is probably a good idea, no matter what thickness it is.
[Proper historic conservators will applaud the (barely) discernible difference between your new leg and the seven originals; no one will accuse you of trying to pass off the repro as original, and museum people everywhere wlll applaud your thoughtfulness.]
A form can be made from each side of your identical leg without calculation for spring-back, which is directly related to the amount of force applied during glue-up to make the materials conform to the shape of the mold. Your veneers will require no force at all in that regard. If your existing leg prototype can be protected from glue, perhaps veneers can be added to each side of it, to make a pair of laminated forms ?
I have no doubt that you could get a pro to take this on, if you can find him or her.
Even gloss Formica should probably be waxed to resist unintended adhesion.
A glue that sticks well to teak and other wet or oily woods is polyurethane glue. There is twenty minutes or so of open time before the expansion of the glue begins to make clamping difficult. With up to thirty leaves of veneer, though, you'd better have an efficient way of applying glue, no matter what the adhesive selected. Rolling would be my choice, I think.
A glue that doesn't expand would be preferable, though. I don't know if urea resin or PVA white glue, both of which have adequate open time, would require de-oiling of the veneers before the glue-up.
its such a tricky project wit...
its such a tricky project with so many variables...It makes my head hurt. I've had good results with poly glue on oily timbers, but (perhaps its the brand I use) it makes a foamy mess. I laminated some strips of cedar a while ago and instead of brushing or rolling it on I tried an experiment and ran three beads of glue down each strip, laid the next strip on top, rubbed back and forth for a about 5 seconds and laid the next strip on, etc etc etc. I clamped it onto the mold and after about a minute pulled it all off, seperated the strips and had a look at the glue spread, it was pretty good.
It was faster and cleaner that using a roller.
I would seriously consider paying to have it done, I'm sure you could find someone.
Yes,
that's the method by which I spread 80% of all wood glue that I use.
The foaming is normal for poly glue. Unfortunately. It does clean up easily after its fully dry -- a foam that scrapes and sands away easily.
The most tedious part will be making the forms. A lot of work for one part. You can see why one wants to be in production with this method ! Expect to pay handsomely for this reproduction leg, if it's made correctly.
I've had more of a think...
I've had more of a think about this, I would sribe the male side of the piece onto a piece of 8mm thick masonite, cut to this line extremely carefully, use this as a template to rout out 3 or so layers of 20mm thick mdf or ply (however many you need to give the width of the leg plus a bit more). Glue and screw these together on a flat surface and check that they it all squares up as you go.
Cover the surface with the brown packing tape I mentioned, its very thin and pretty tough. Buy the veneer yourself and cut it to size, even buy the glue yourself and get thee to a small boatbuilder or anyone with a vacuum press and ask them to finish the job for you, you'll save a lot of money that way I think and are pretty likey to get a good end result.
I hope that helps.
If you need any help, please contact us at – info@designaddict.com


