Recently finished one of our fall projects at the chalet, turning what was, once upon a time, a single-car garage then sauna, into a kids' dormitory.
Here is the link to the album on my FB blog page. If this link doesn't work, I'll come back and post individual photos. (OK, the link works. Click on each picture for a little more information).
https://www.facebook.com/media/set/?set=a.762863857083244.1073741833.116...
Hi Riki! Very nice all the chalet, that we saw it before.
But the kids room is super uber cool. Kids will love it!
The system to hold the beds is interesting.
I imagine that is more complicated to build it that it looks. as Heath said once, those things that look so simple are most of the times more difficult to do.
Thanks, Gustavo. The base is 3/4" cherry ply (the new kind, with a layer of MDF below the face veneer, for flatness) and the upper element is a hybrid of 3/4" ply, solid poplar, and 1/8" ply. I learned some new wrinkles, such as the sanding, steel-wooling and buffing of both clear polyurethane and black spray-can lacquer. 220 paper and 0000 steel wool, followed by rubbing with cotton knit, makes a glassy low-sheen surface -- when the material was applied with roller or spray can.
I started the black finish with sem-gloss latex, but no amount of rolling or brushing produced a smooth surface -- by a long shot -- so I had a lot of sanding to do. But that made an acceptable base for the spray lacquer. Lesson learned; next time I'll start with conventional primer.
The original design called for the whole piece in cherry, which would have meant grain-matching the turret to the base, and the fitting of cherry solid to the upper curved edges. When the client decided she wanted the turret to be black ("to match the TV") my life was made somewhat easier.
Thanks ! Yes, I occasionally explore the wild side. In this case my elbow was pushed by the client, who didn't care for the first study, with its boxy frankness (see below).
Height considerations drove the other change, namely the removal of the TV from its stand. I was inclined to include the radiused edges anyway, for the purpose of resisting vacuum dings to the lower corners.
Not a work of art -- more a home appliance. But it was fun to solve the problems. The mechanism is just four fixed casters riding in a circular costraint, with detents at the "home" positions" and a block to prevent continual rotation in one direction, which could create a tangle of wires in the base compartment.


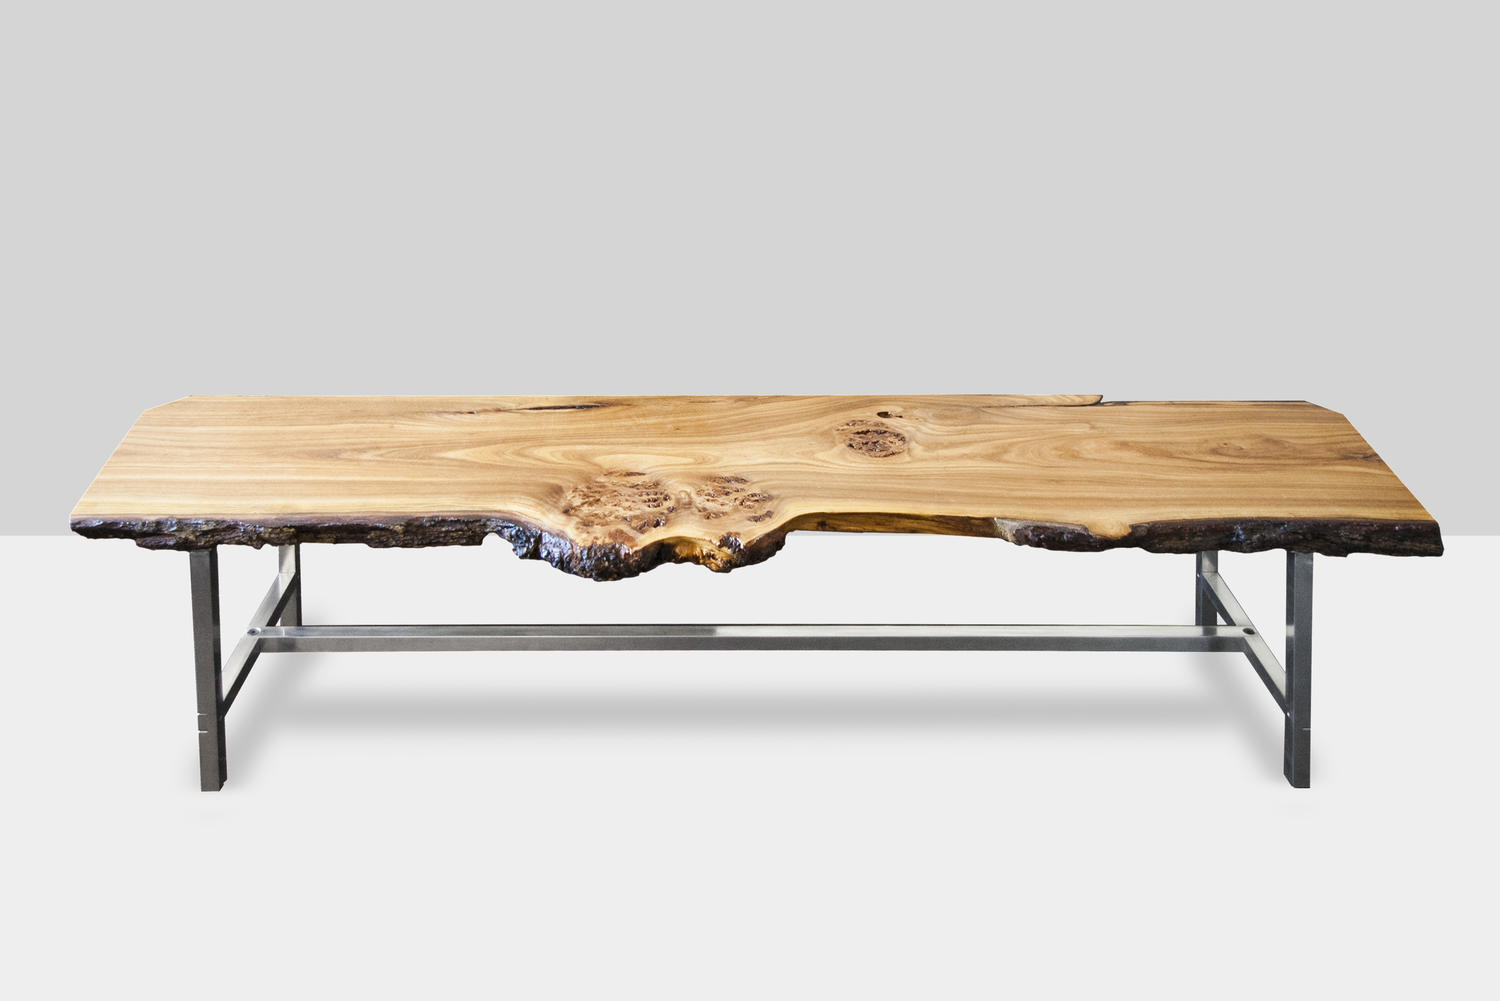
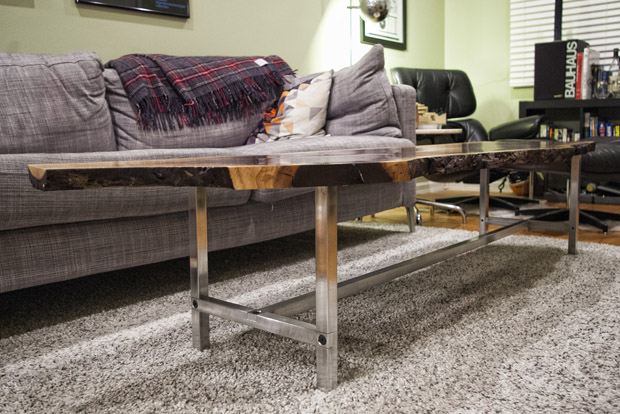
A built a coffee table for a buddy of mine. He came to visit me in Chicago and I challenged myself to build something flat pack that didn't look like it came out of an IKEA factory.
The top is an 8/4 live edge Elm slab. I love the burl through the middle of the table. My friend elected to keep the bark on the slab.
The base is solid 1" bar 6061 aluminum. All of the joints were hand machined on an old Bridgeport mill. Each joint was then drilled and tapped to accept a 5/8-16 counter-sunk machine screw. Each cross member fits into a tight pocket on the other. The whole thing comes apart by removing the 6 machine screws.
The base is attached via machine screws passing through aluminum plates that were welded to the cross members. These go into wood inserts, allowing to be removed as many times as needed.
While I was at it, I built a second base for myself to replace a pair of hairpin legs I had on a previous black walnut slab table I built. I can't stand hairpins anymore, they're much too cliche and played out.
If you need any help, please contact us at – info@designaddict.com


