I've been doing this for about... eight months. It's a pretty silly thing to do, but I've learned a great deal. I haven't ruined a piece yet (so they insist), but I feel like I've ruined them all. I'm particular and a perfectionist but I have a lot to learn, still. Sometimes it does feel like a foolish endevour.

I'm warming to you. First impressions can be misleading. I had that one festering for a while, and you were the unlucky target. And, kudos (again) to tktoo and Leif and spanky and others, whose combined expertise would fill a nice little book, if DA ever decides to get into publishing . . .
Let's carry on then shall we.
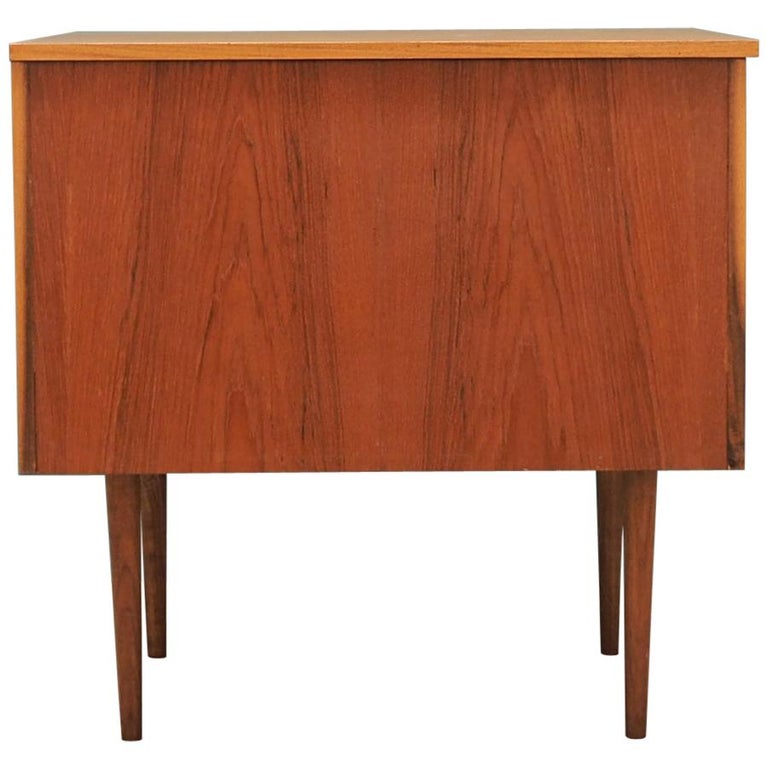
The top looks fine. Unless there's something wrong with it that the photos don't show, I wouldn't go to the trouble of re-veneering it. If it were mine, I would sand I very gently, just enough to get the varnish off. I hesitated to mention this before because it is very easy to do more harm than good with a sander and your plan to strip the top with do just as good with much less risk.
So do either. Router off a nice clean edge around the top. Apply edge banding. Flush to the top leave excess below. Clamp it tight til dry Then sand, route, or do whatever you prefer to get it to the finish profile.
Then put teak oil on (watco e.g.). I haven't really seen a photo that shows the lightness, but odds are good teak oil will fix it. If it is still too light try some more. Or you can get a bit more tint by adding a touch of artists oil paint, just a touch.
As for the drawers: I would get new veneer with nice matching grain for all four. I think you could just veneer over the exisiting after patching the missing veneer. But if you really want go all out you can remove the existing veneer first.
Palsson your plan to patch and paint the veneer isn't bad, but it is hard to do well, and even the best job only fools so many people for so long.
And call it a day. Take a bunch of photos of the work in progress. And post them for us.
As to the ID: I've never seen the desk before. I very, very strongly doubt it is a design by anyone famous. But it is a very nice desk anyway and I am glad to see you are fixing it up. If you really want to pursue identification, you will probably need to focus on how it was built, thing like drawer construction (handles, dado, substrate...) and anything little detail that might connect it to some other known or marked desk to try to find the manufacturer.
What if I got a couple piece of teak, say, that were maybe the length of the desk top and the depth of the desk top, each, about 4" thick? Then I could route them as one piece, rip them in half to size, and then glue them up? I don't know how confident I am about trimming up already-glued edges... I'd rather have the pieces perfect and then attach. This way I don't have to remove anything if I screw up with the router. I'd rather sand down any slight imperfection after-the-fact.
Right now my ten-step plan is to:
1) photograph this thing and post pictures before anything else... providing nothing changes by this, I will2) strip the top,3) manufacture edges,4) glue edges as discussed,5) lightly sand top, edges, etc,6) attempt the fill and dye job on drawer, for fun,7) remove and replace all four draw faces,8) oil to death,9) replace the key,10) stop thinking about it and enjoy it.
Am I missing anything?
It's a good thought, though, about publishing. I know I would pay good money for a book of projects you all have worked on, with decent pictures and descriptions. Everything I know about this type of thing I have learned through this place, other woodworking forums, and woodworking/finishing books. There is a lot of knowledge in these pages... somebody should be saving it.
Your list looks good. I guess you will find new wood and veneer that match the color of the raw wood of the original construction -- assuming a clear (oil ?) finish. This is not as easy as it sounds -- which is the reason many manufacturers resort to stain, I believe. A given specie can vary widely in color as well as grain appearance (initially determined by the cut: plain, quartered, rift, etc). Broadly mis-matched grain and/or color will usually defeat a professional result.
The above is particularly important on elements appearing on a given plane of the furniture piece. Turning the corner -- as from face to top -- helps disguise color differences; the top veneer can be somewhat different from the other faces without spoiling the appearance of the piece, in my experience.
Now that the site has been redesigned, we have a separate discussion option for "Repairs." (See "Filters" above. This thread should perhaps be moved there. If so, our administrators and hosts Patrick and Alix would do the moving.)
I haven't checked to see if past repair threads have been added to that department. If so, that would amount to the "book" we are talking about ? I kind of doubt that's been done, as it would be a major editing task.
So I finally got around to taking some pictures of the progress on this... fell off the wagon for a while. I've got the drawer patched, made a new pull, and am basically ready to start oiling and finishing it. I'm attaching some pictures of the trim I put on there... it's Mahogany, not Teak, but I should be able to color it OK. I have one more question for the experts here, though...
As I've sanded the top flush with the trim/banding, I've come about as close as I'm comfortable getting to the bottom of the veneer (at least I think this is what I'm looking at?). I'm going to have to color the top slightly, but my issue is that the pores still show a lighter wood, sometimes almost a white filler type thing. Anybody able to say with any certainty? I'm guessing that I've just taken the veneer down so far that I'm looking through it, almost? Perhaps this is leftover filler from the original finish? I have no idea, but it shows up when I wipe it with spirits, so I'm guessing it will show when I give it some oil. I've never really used wood filler... is that what's needed? I'm wondering if I can't glaze or something to color the pores, lightly sand again to clear the top, and then add my oil and tint. Any thoughts? I'm very close on this and motivated to finally finish it and put it into use.
First picture is just the finished trim, second two shots are the veneer after wiping with spirits.


Teak naturally contains calcium carbonate deposits here and there inside the tubular vessels in the wood. I believe that is what I am seeing. It does not look like you are seeing through to the substrate. When that happens it looks like a translucent layer of teak over particle board, which is quite different.
Virtually any finish material would tend to darken those spots, wouldn't you say, Leif ? A trial of volatile liquid -- mineral spirits, lacquer thinner -- would have the same effect ?
I'm amused to recall what an appraiser told the owner of an antique clock: "Those little white spots ? I think they're there because someone neglected to cover this piece before painting the room it was standing in . . ."
SDR: not sure what you mean?
Often when I see a calcium deposit in teak, it is a long streak filling a tube. Sometimes the deposit will just a fleck or two here and there. Some pieces of teak have a lot of calcium, some have none.
Of course the spots could just be paint as SDR is suggesting. But if you have sanded it is hard to see how you didn't sand off the paint. The photo is not remarkably sharp, so some of this is guesswork.
I'm pretty sure it isn't paint... but I don't know what it is. If spirits doesn't darken it, what then? I'm thinking I can tint and wet sand with Teak Oil, but I'm also getting the feeling that if I don't fill the spots in the first go-round, I might end up having to live with them. They aren't totally obvious, but I'm picky and insane. I would like for the top to be impressive, but I don't want to have a thick film of finish on the top, or have to paint it or whatever.
I'm completely willing to concede that I've been staring at this desk too long, and that what I'm fretting over is totally normal. I'd like to cover it and fill, if I could, or obscure it in some way. I have to add color to the top anyway... perhaps I could do it here? But I have literally no experience with wood filler.
I'll try to get some better pictures tomorrow... thanks for the wisdom.


If you need any help, please contact us at – info@designaddict.com