Thanks, Leif. Yes, that's the main thrill, the way the thing floats in front of the window. You can see that I suppressed the attachments to the sill, by tapering them downward toward the glass, so they are mostly invisible. And, from across the room and when seated, you can see a strip of glass just under the black "chassis" of the piece.
The column sandwiched by the pair of beams is eight inches deep, so that determined the spacing of the beams, and their distance from the window wall. I used a pair of 3/8" carriage bolts to pinch the beams to the column; they sit on a collar of bamboo plywood which in turn sits on the tall baseboard. The whole thing sort of designed itself. When that happens I'm happy; that's pretty much my goal.
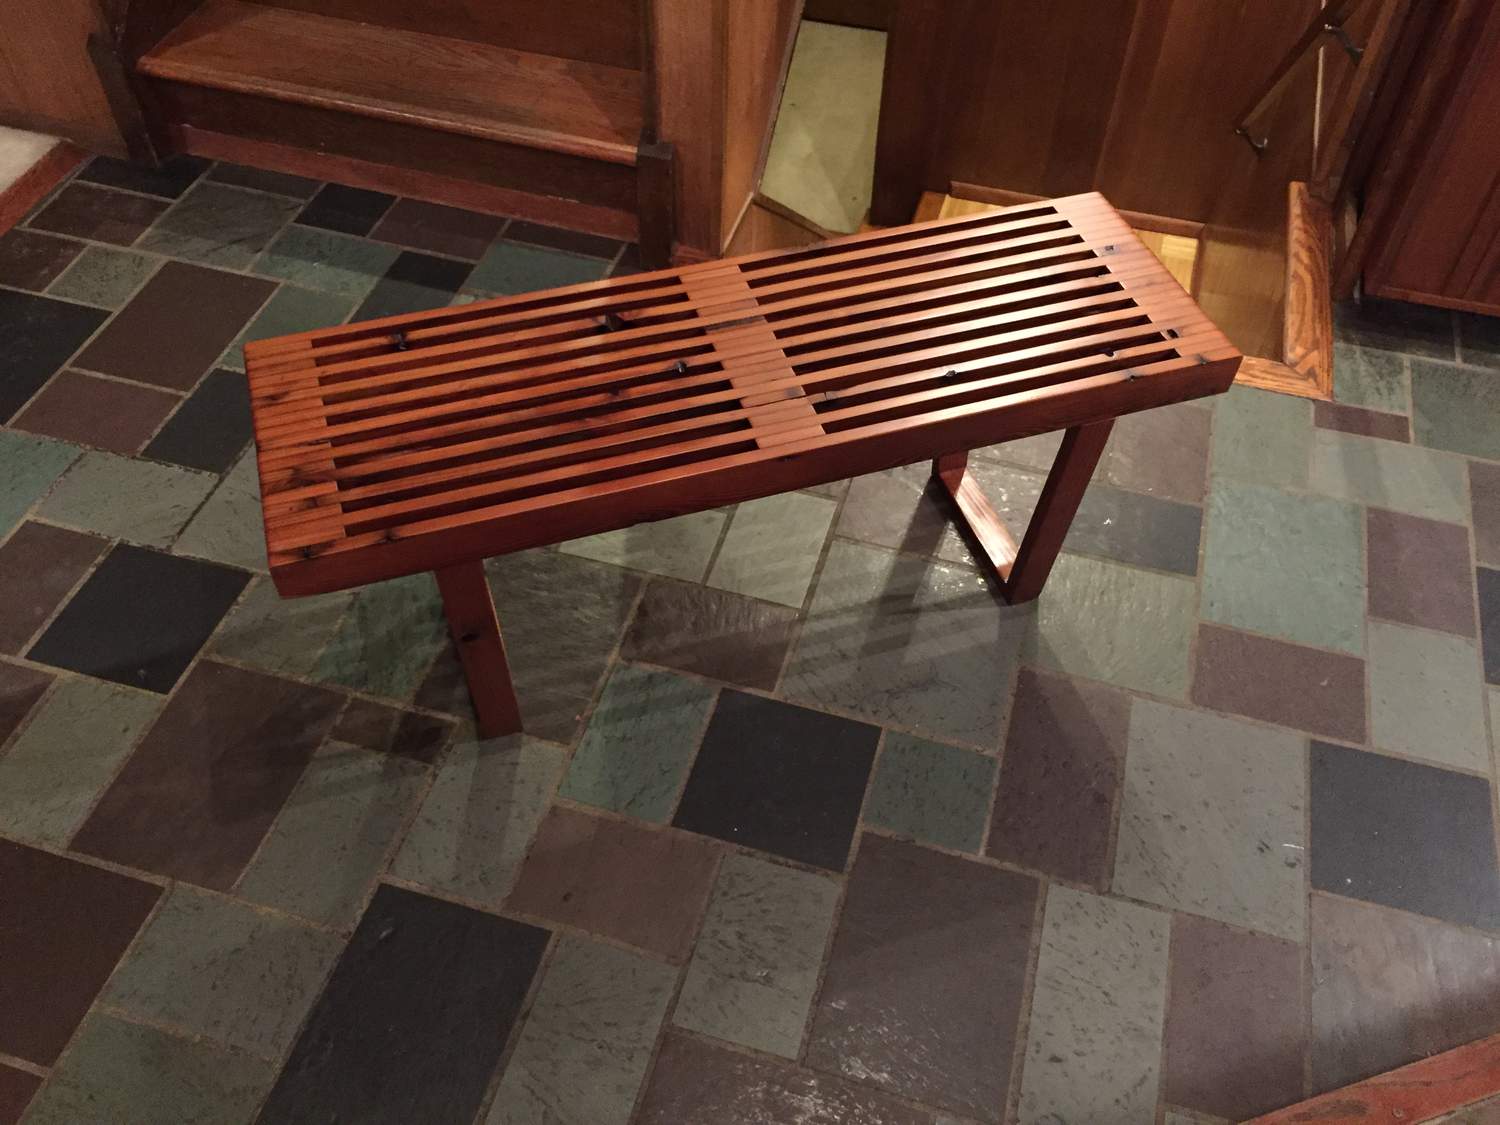
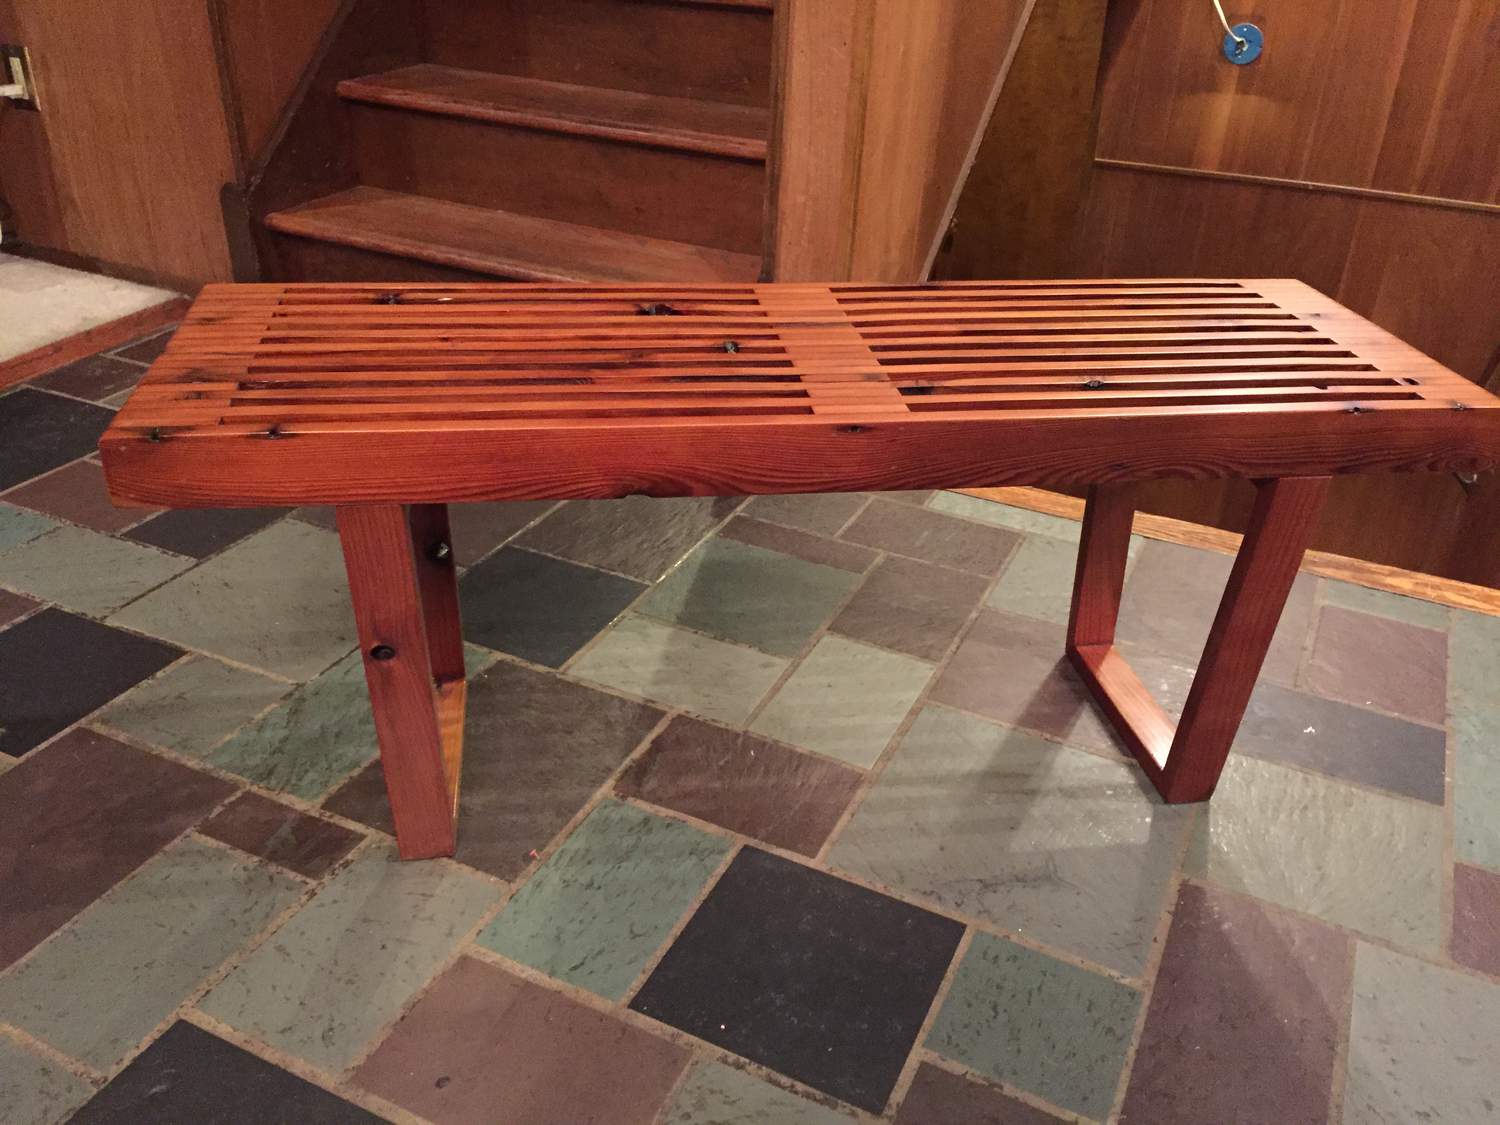
Took a shot at a Nelson-style bench. I helped my neighbor take down part of his old stairway leading up to their screen porch, which just happened to be old-growth redwood. My payment for helping take it down, was that I got to keep all the wood.
Well, you cannot waste a beautiful and increasingly rare material opportunity like that! This effort was prior to finding the actual dimensions of the bench, so the proportions are not great. I made it a bit too tall, as I was considering how my 6'3" frame would feel sitting on it. I whipped it together in two days, and tried to use the least desirable pieces that I acquired. Finished it in Sikkens Cetol clear exterior, UV blocking finish, as I think redwood looks best red (just does not silver out as well as cedar and teak). It will mainly be used as a plant stand on my deck, in the summer.
I am planning a Nelson-style bench with more accurate proportions, currently. The trapezoidal legs will be of rectangular, stainless steel tubing, and the bench top of the more clear, and better quality redwood that I have. Should stand up nicely to the Midwestern climate, once finished. Also planning out a walnut topped and maple topped bench in the style of Nelson, but not sure which direction I will go with the leg material (have jigs made up and a plethora of scrap wood around, so I figured, why not make a few out of my favorite materials. Great gifts for neighbors and family....)
Interesting. I'm glad you saved the better redwood for the better project(s) -- very wise. It's a pleasure to see someone have some "fun with windfall" !
What sort of the material is the stainless you'll use for bases next; is it rectangular tubing, to be cut, welded and ground, to replicate Nelson's black wood base form ? Or perhaps angle stock, made into a four-sided welded frame also of the correct proportion ?
By the way, that's a pretty appealing tiled floor you have, there. Is that stone . . .?
Thanks SDR. It is not fine modern furniture quality by any means, as I am still early in my woodworking practice, but I am happy with the general appearance and utility. It was a decent first attempt, and it kept my mind and hands busy for a few days. Working wonderfully as a summer stand for the plants on the deck.
Redwood is one of my favorite domestic woods. So I was very excited when I figured out that my neighbor's stairs were redwood. I also pulled the deck off my house last summer, which also happened to be redwood, so I am sitting on a 4-500 board feet of it. Both my deck and my neighbors stairs were original to our homes, built in 1963 and 1961 respectively. So, it is pretty amazing stuff to be able to survive 50+ years of midwestern weather. My home is a modern design, and the whole deck was cantilevered off the floor joists. Unfortunately, these joists were rotting-out on the last 2 feet, so the whole deck needed to be removed and rebuilt; 60-70% of the redwood decking was still in excellent condition however. It is really too bad that we can't get the old-growth stuff anymore, but I completely understand why this is the case. Amazingly, as I am slowly getting through a complete remodel of the house, I am finding most of my house is built out of the stuff, the siding, all the exterior wood molding and trim, interior floor and ceiling joists, pretty crazy.
The floor in my entry way is slate. Unfortunately, previous owners tried to seal it or something, and there is a layer of dirt/grime that cannot be removed, despite my various attempts. I am not sure if the top layer can be ground off, or what the solution is.
...and yes, I will be doing the next bench in 1"x 2" 14ga 304 SS tubing (left over from my deck re-build). I already cut and welded together 2 sets of bases. Still need to grind and polish however. While the tubing is not the 2 1/4" x 3/4" that the original bench base used, I think it is close enough that it wont detract from the final aesthetic. Height and width are correct this time, picture attached.
Nice work!
Have you tried stripper on the floor? My daughter's house has a flagstone floor in one room that has some kind of yellowed varnish or maybe polyurethane on it. I did a test patch with stripper and it came off pretty easily.
I have a slate floor in my kitchen and every time I walk on it with bare feet I'm aware of how good it feels. It has a good quality stone sealer on it but nothing that keeps it from looking and feeling completely natural.
Thanks, all. I will definitely put up pictures of the next bench when it is finished. That one will have lap joints, and a form much more true to the Nelson design.
SDR, I forgot to tell you, I really like those planters you made out of redwood. That is also on my list of summer projects with redwood (which need to fit between remodeling efforts on the house), planters for the deck.
Spanky, thanks for the suggestion. That certainly might work. I have mainly researched and attempted cleaning methods to this point ... been a little hesitant to go too aggressive, as I know slate can be susceptible to chemical damage. Any idea how slate holds up to stripper? Did your daughter try the whole floor yet, and if so how did it turn out? Also, what type of stripper did you try ... Methylene Chloride, or other? Sorry to hit you with a bunch of questions, but this dirty slate issue has been bothering me for 2 years now...
I would get a few new slate tiles and see what different strippers do to the slate. It's very porous (which is why it feels so good on bare feet) so citrus-based strippers might not be good because I think they have oil in them? I'm not sure.
My daughter's floor is not slate but flagstone, which is a harder rock. She has a young kid and didn't want me to use anything that would leave fumes in the air for long---I think it was winter so windows couldn't be left open? I tried this stuff and it worked pretty well-
http://liftoffinc.com/spray-paint-graffiti-remover/
Methylene chloride stripper would probably work faster, though, and there are water wash versions that would make final clean-up a lot easier. But you'd need to have very good ventilation. DO get a respirator if you don't already have one! I have a cheap 3M one that I love--fits perfectly and the cartridges last a long time though I admittedly don't need to use it often.
Thanks for the additional detail. The house has 3 other slate flooring surfaces as well, both of the other ones are rough, natural surfaces. I think there might be some scraps from these later slate additions somewhere, I could give it a try.
I understand your daughters concern .... my day job involves making sure that products do not contain dangerous chemicals. I am an expert in chemical regulation, and there is plenty to be concerned about in my experience .... especially when it involves children. Needless to say I have two 3M respirators(one with dust filters, one with organic filters), a North Respirator, and a Allegro Supplied Air respirator from my boat painting days (the 2-part stuff was very nasty, chemically), so I am covered!
Good to hear! I wish I'd had a respirator from the start but they used to cost a lot more and I had even less money then! And I was young and immortal.
I think you might be able to get single slate tiles at Home Depot or one of those stores, if you can't find any scraps laying around. If not single tiles, then a box of the really cheap stuff from India usually isn't too much money.
So I decided to take some time during my holiday weekend to bang out my prototype Nelson style bench in reclaimed redwood and stainless steel, discussed above.
It is not an exact replica of the Nelson designed bench, but quite close. I am pretty happy with how it turned out. I also had the chance to take notes on what went well and what didn't, and also make some jigs for future planned benches in other materials. The joinery is admittedly not super tight, nothing like the fine examples above. But, in the future, with the knowledge I gained, I should be able to tighten things up quite a bit.
I just love the combo of Stainless and Redwood. It is beautiful, amazingly functional, weather resistant, and will last for decades. I will probably give this one away to friends or family, and start on the next one soon.


On a much smaller scale....
I've been wanting a set of Jacob Jensen Vikings for a long time but they usually sell for $200-300, which was beyond my budget for something I didn't really *need*, especially when i have so much stuff already that I don't really need. But then I got this set for a price that was shockingly low, even by my standards. The catch was that some parts were missing---but nothing I figured I couldn't make myself, at least of passable resemblance.
Oh, PLUS, I realized they are perfect displayed on the granite stones that I picked up off the north shore of Sjælland, Denmark, from which actual real Vikings once set sail. So that was pretty cool.
Anyway...the legs on the short one are made from an old size 10 birch knitting needle---perfect diameter so all I had to do was cut it to the right length and whittle the ends to size.
The shoes on that one were also missing. I think the originals are birch stained black (something light stained black, anyway) but I didn't have any solid birch scraps so I glued together two pieces of a beech paint stirrer that I saved from when we lived there in a house that needed a lot of painting. This gave me a block that was only a little bit too thick---nothing I couldn't shave down. I did have the smarts to drill the leg holes before I did anything else. I just used the shoes of the other guy as patterns and traced around them after lining the holes up. Then lots of whittling followed, a few cuts and bloodstains on the beech, some sanding, and a final staining with a black Sharpie (EXACTLY the color of the originals!) and they were done. The holes in them aren't exactly plumb, but if that guy is standing on a rock it's not noticeable. Whew.
The only other part was one of the hands---I made one out of the birch knitting needle but after sanding it was a hair small and then I chipped it around the hole, then it cracked when I tried to put the spear through it---so i whittled a new one in oak. Not the right species but who cares! I also skipped the very narrow cut that allows the hole to open a split hair wider. I don't have a band saw. That would have made a bunch of things easier to do, and a drill press would have enabled me to drill the leg holes in the shoes perfectly plumb. Oh well...next time.
Now I want some more of these so I can change the parts around and have five or six different ones.


If you need any help, please contact us at – info@designaddict.com


