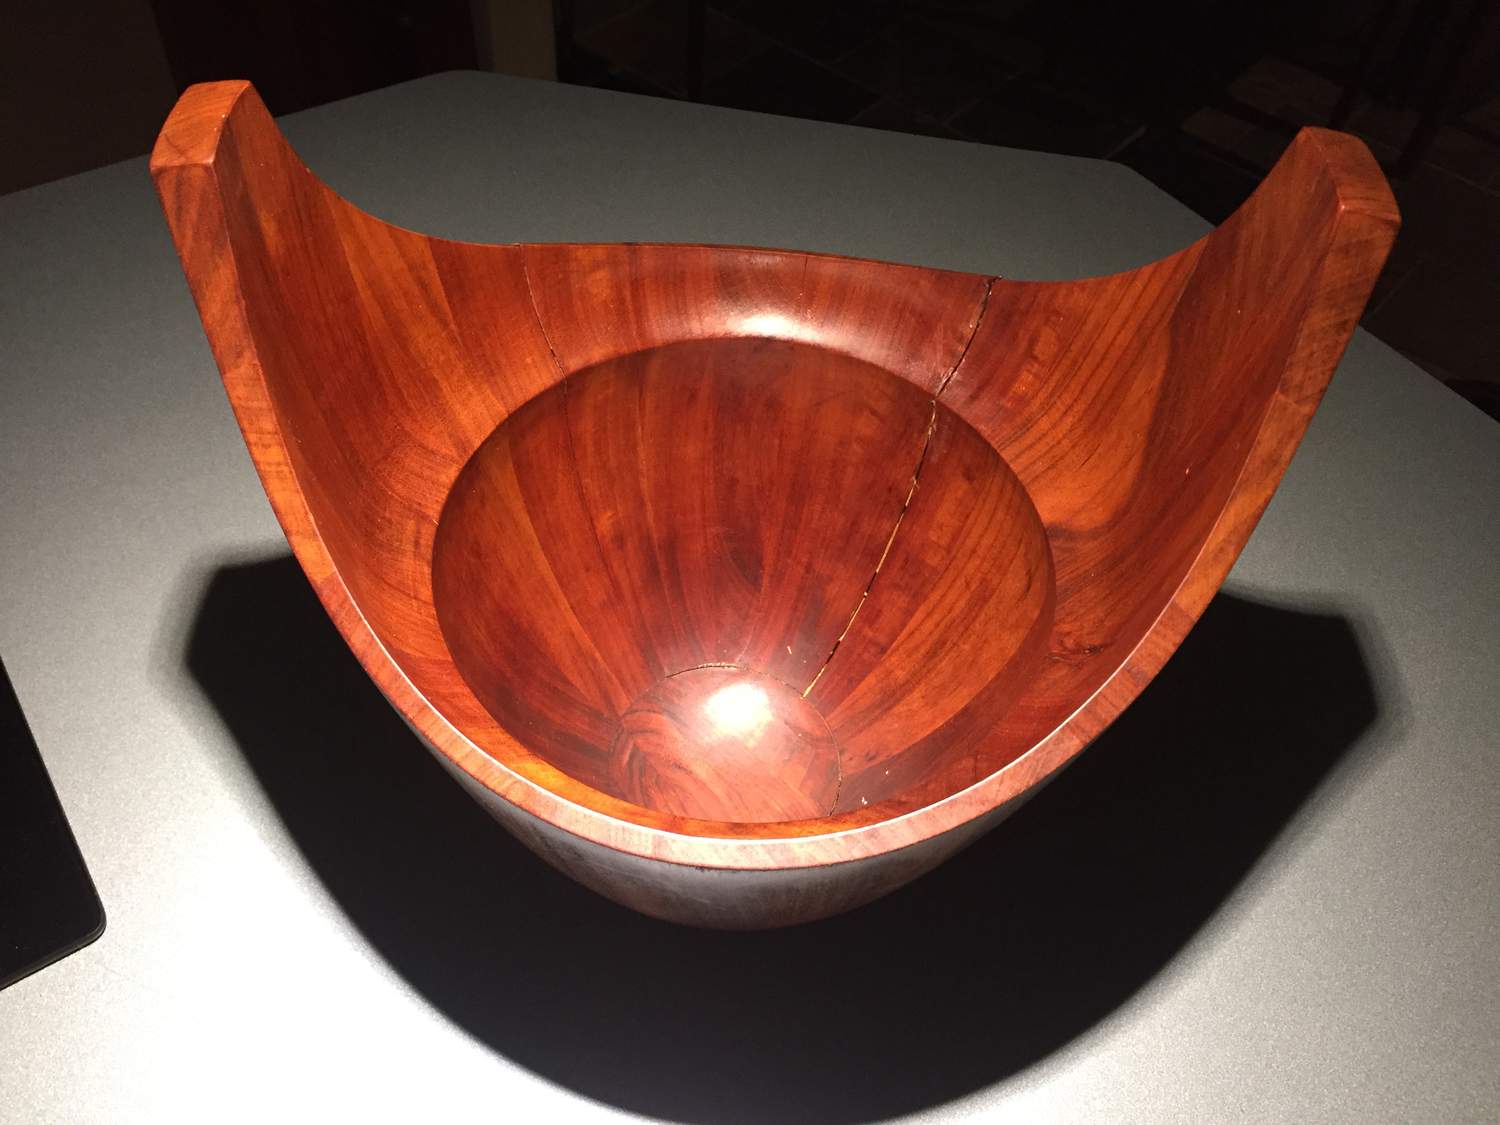
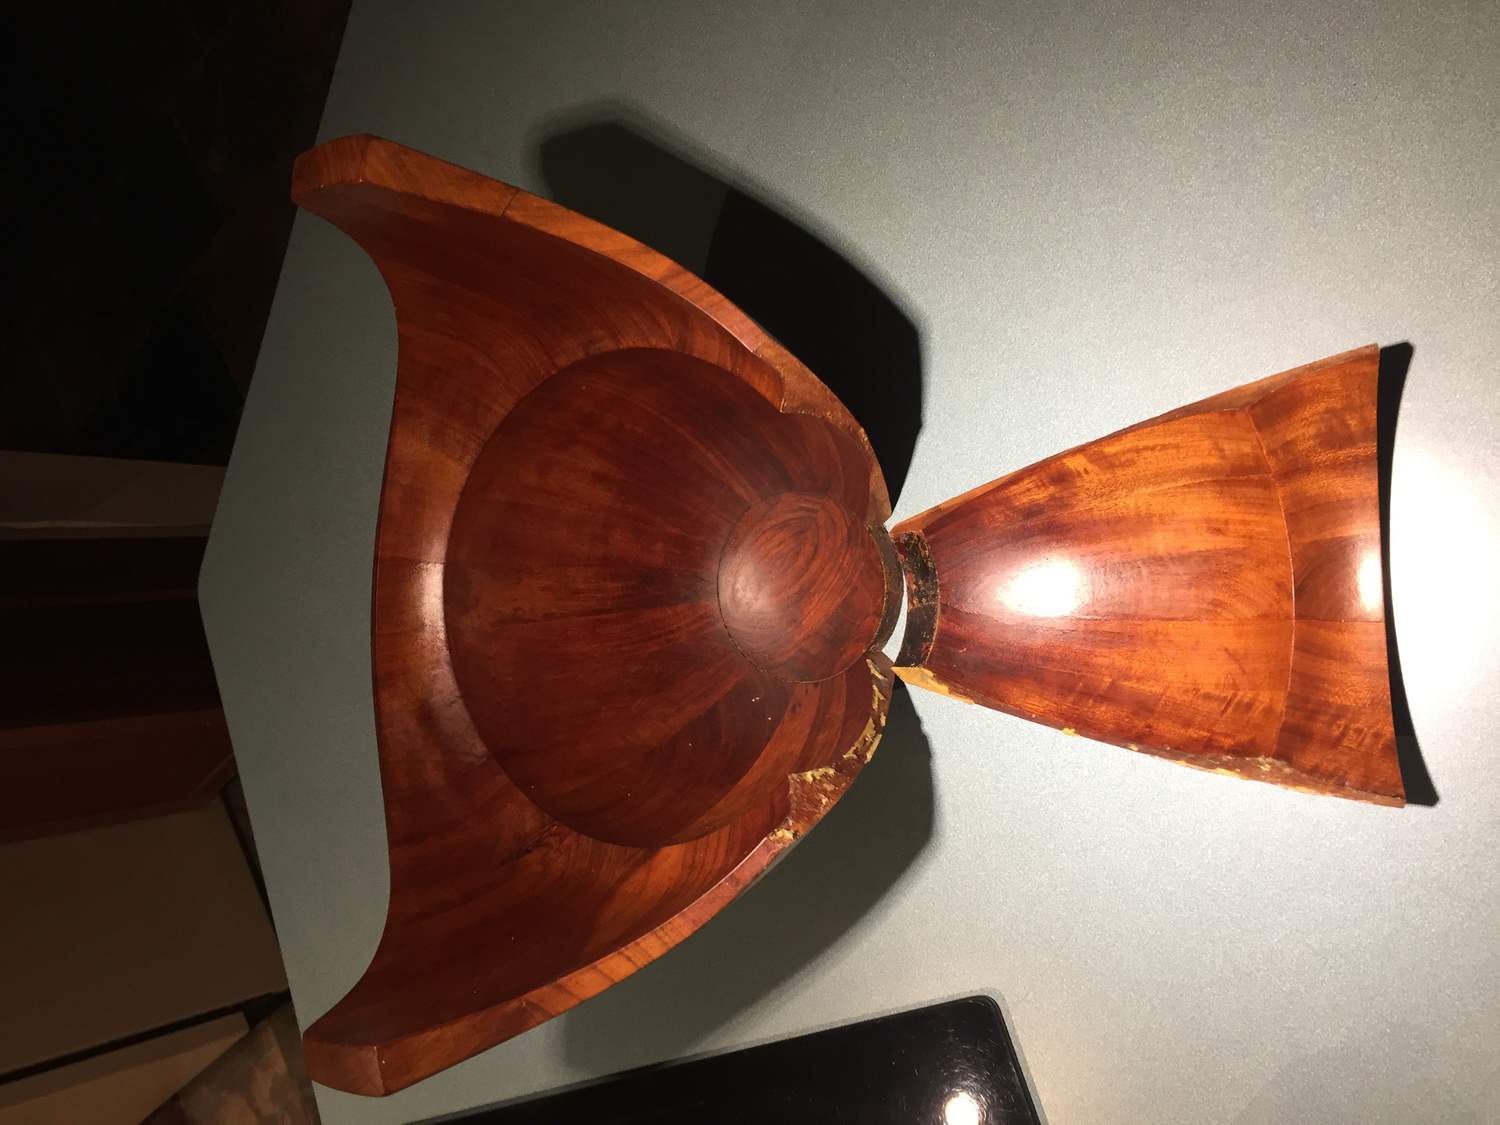
Was fortunate to find the Dansk Rare Woods Viking Salad bowl, Model 1636, designed by Jens Quistgaard. Didn't come with the servers unfortunately, but it did come with some large cracks. The price was right regardless, but now I have to figure out how to fix it.
There were previous repair attempts. Looks like maybe PVA. So I will scrape the old glue off as best as I can. May need to try the white vinegar removal technique to get any stubborn residue off. Sanding with be a last resort, and I would like to keep as much of the existing contour on the wood as possible, to promote a good repair joint. I think Tightbond II PVA is probably the best glue to use for repair.
Big question is how to glue this up? With the joints being curved as they are, getting good, static pressure is going to be tricky. This is a really beautiful, and fairly rare piece, so I want to make sure to do this right. Looking for any suggestions on clamping/applying pressure during glue up. Thanks in advance!

I believe circular compression is the way to go. I'd use a couple of strap clamps with some rubber sheeting or blocks in between to minimize slippage. The blocks might be a bit better to allow room to tighten the clamps. Maybe make some type of wooden jig if necessary to better hold the pieces in place.
Reminds me of a similar fix I did a while back before I had strap clamps. I re-glued a loose seam in a staved wood bucket. I took an old t-shirt, wrapped it around the freshly-glued bucket, and tied the ends in a knot. Then I stuck a stick in the knot and twisted it. The fabric had enough stretch to act as a cushioning clamp as I twisted the stick. Then I stuck the stick under the edge of a piece of furniture to hold it in place while the glue dried. Low-tech, but ended up working nicely.
Rubber bands and duct tape.
Ive used strips cut from bicycle inner tubes for tricky clamping like this with good success. They come with a dry slip agent on them that washes of with soapy water, but they're cheap. Stretch a long strip around a few times and fasten the end with a long piece of duct tape or tie knots to make loops or tourniquets. You can get pretty good cross-joint tension with better quality duct tape, too.
I thought about using a tourniquet-type set-up, but it seems like there is too many unknowns with that.....
I don't have any strap clamps, but I am wondering if nylon ratchet straps would provide even-enough pressure? I definitely would need to put down good padding in any case. I know they would provide ample pressure, but not sure how even the pressure would be?
Tktoo, I like the tire suggestion. It just so happens that I have access to all of the free bicycle tubes I could ever want, so at a minimum, they could be used for non-slip once the talc is washed off.... didn't even think of that.
Such great suggestions here, really helping me come up with a plan of attack.
Whatever you plan, do a dry run first.
Are you going to try and open the bucket up more so that you can repair the remainder of the crack around the bottom.
(I love the appearance of this design, but it was not a good idea to have attempted such a large scale design in Mutenye while ignoring the rules of wood movement. It might have been more durable in dimensionally stable teak).
Another way you might clamp this: take a length of 2x12, cut a round hole in the middle sized for the top of bowl. Then make one sized for the middle, and one for the bottom. Flip the bowl upside down on a small table, slip the big hole board over it, and put a clamp down from each end of the board to the underside of the table. Then do the same with the other two boards
You will obviously need some form of padding every the bowl surface touches a board for the table.
This way you won't have any problem with slippage.
Does my description make sense?
@Zephyr: there would be a little bit of prep that way. I don't think you would have to make the holes in the boards a perfect fit as long as you plan to add a fair bit of padding between to even out the pressure. You would of course do a dry run and make sure everything clamps nicely. The benefit is that it is not "fiddly" at all.
Gluing and hand holding does work. I used to glue together sculptures made out of split twigs that way when I was a very little kid. Takes a lot of patience, but it works.
If you need any help, please contact us at – info@designaddict.com


